Science, Fiction, Life

Month: October 2013

How to Build a Paver Patio on a Cement Slab: Part 3 – Sand and Bricks

With the border pavers all glued down it was just about time to start the actual laying of bricks. Before you can do this though, you have to add a layer of loose sand. I actually found conflicting advice about this. Some sites said that pavers could be placed directly on top of the cement, but in most cases, they advised half an inch to an inch of sand.

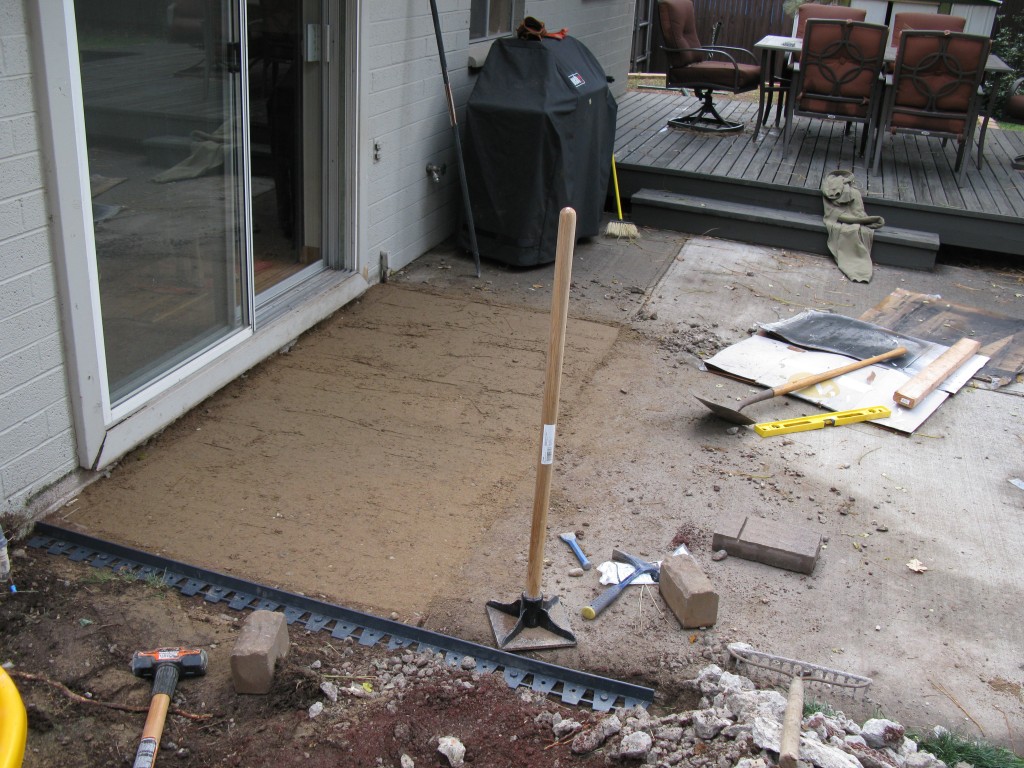
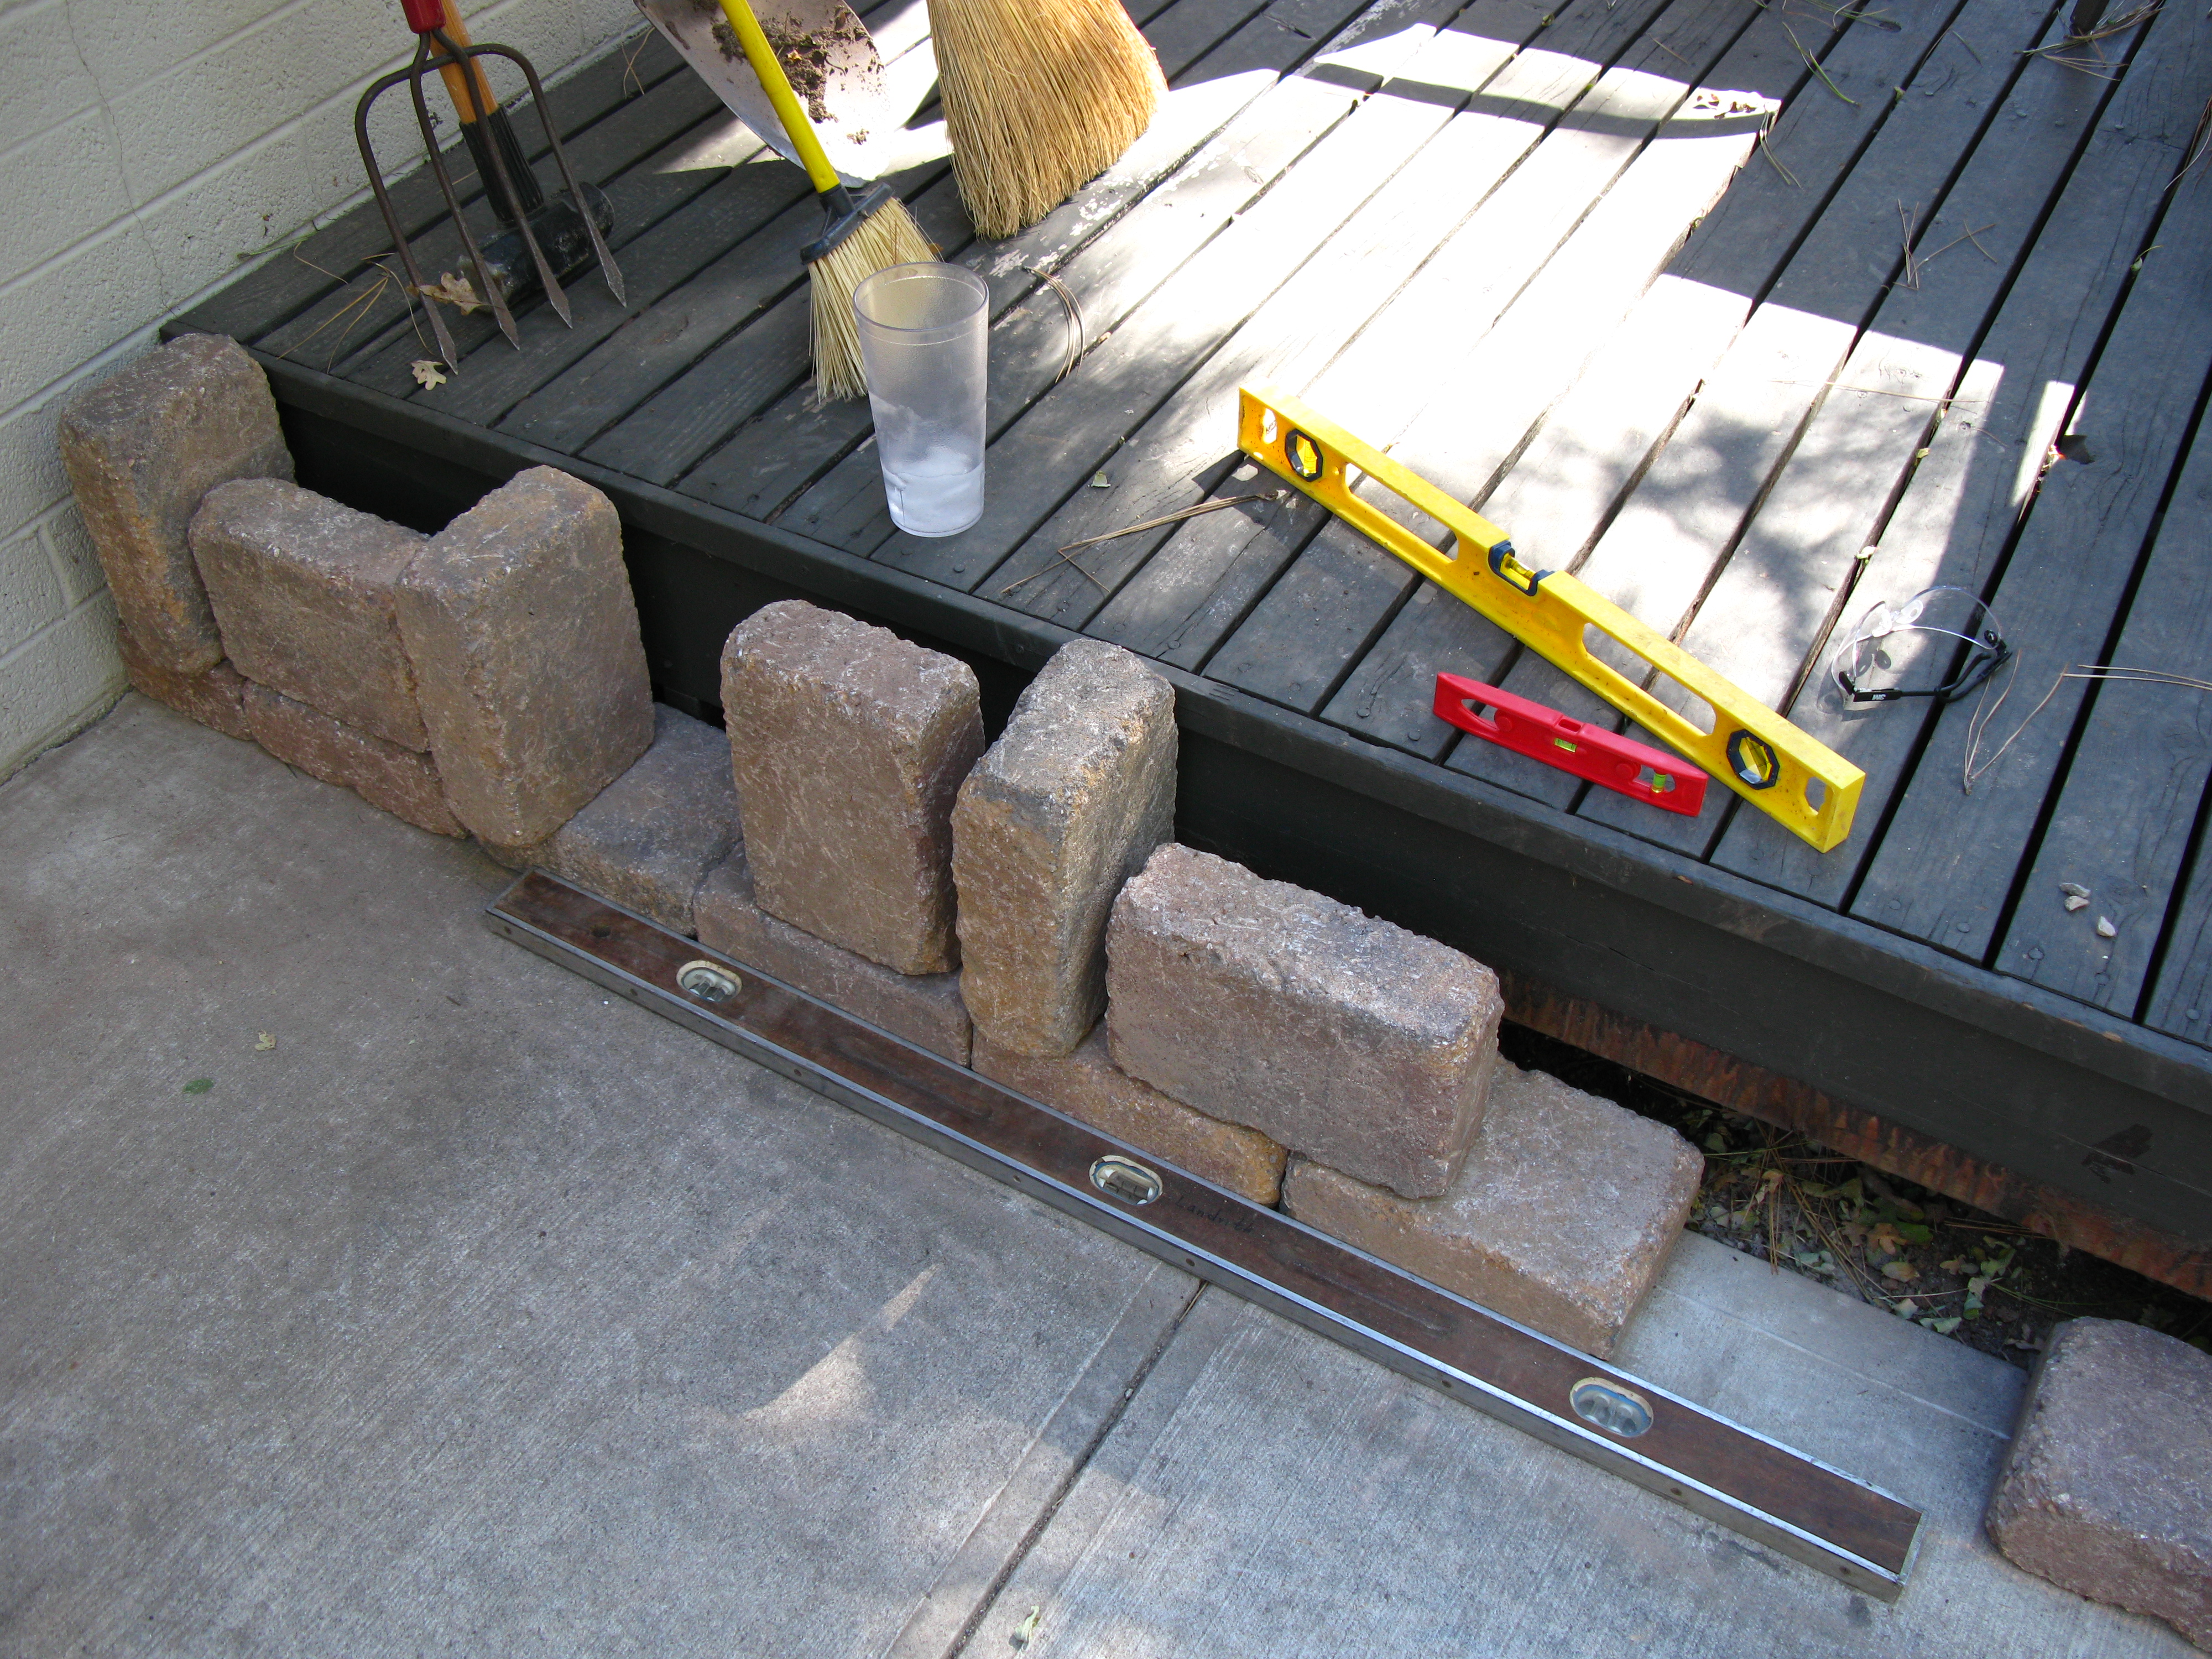
To put down the sand in an even layer, you have to “screed” it, which means use a long straight object to scrape it off to a consistent height. The generally accepted way to do this is to buy a cheap pipe or conduit the thickness of your desired sand layer and place that parallel to the patio border. Then, notch a 2×4 so that part of it can rest on the border bricks, while most of it comes down to the desired height. Now, by dumping your sand bags between the pipe and the border pavers, you can use the 2×4 to screed the sand nice and flat.

IMG_9994

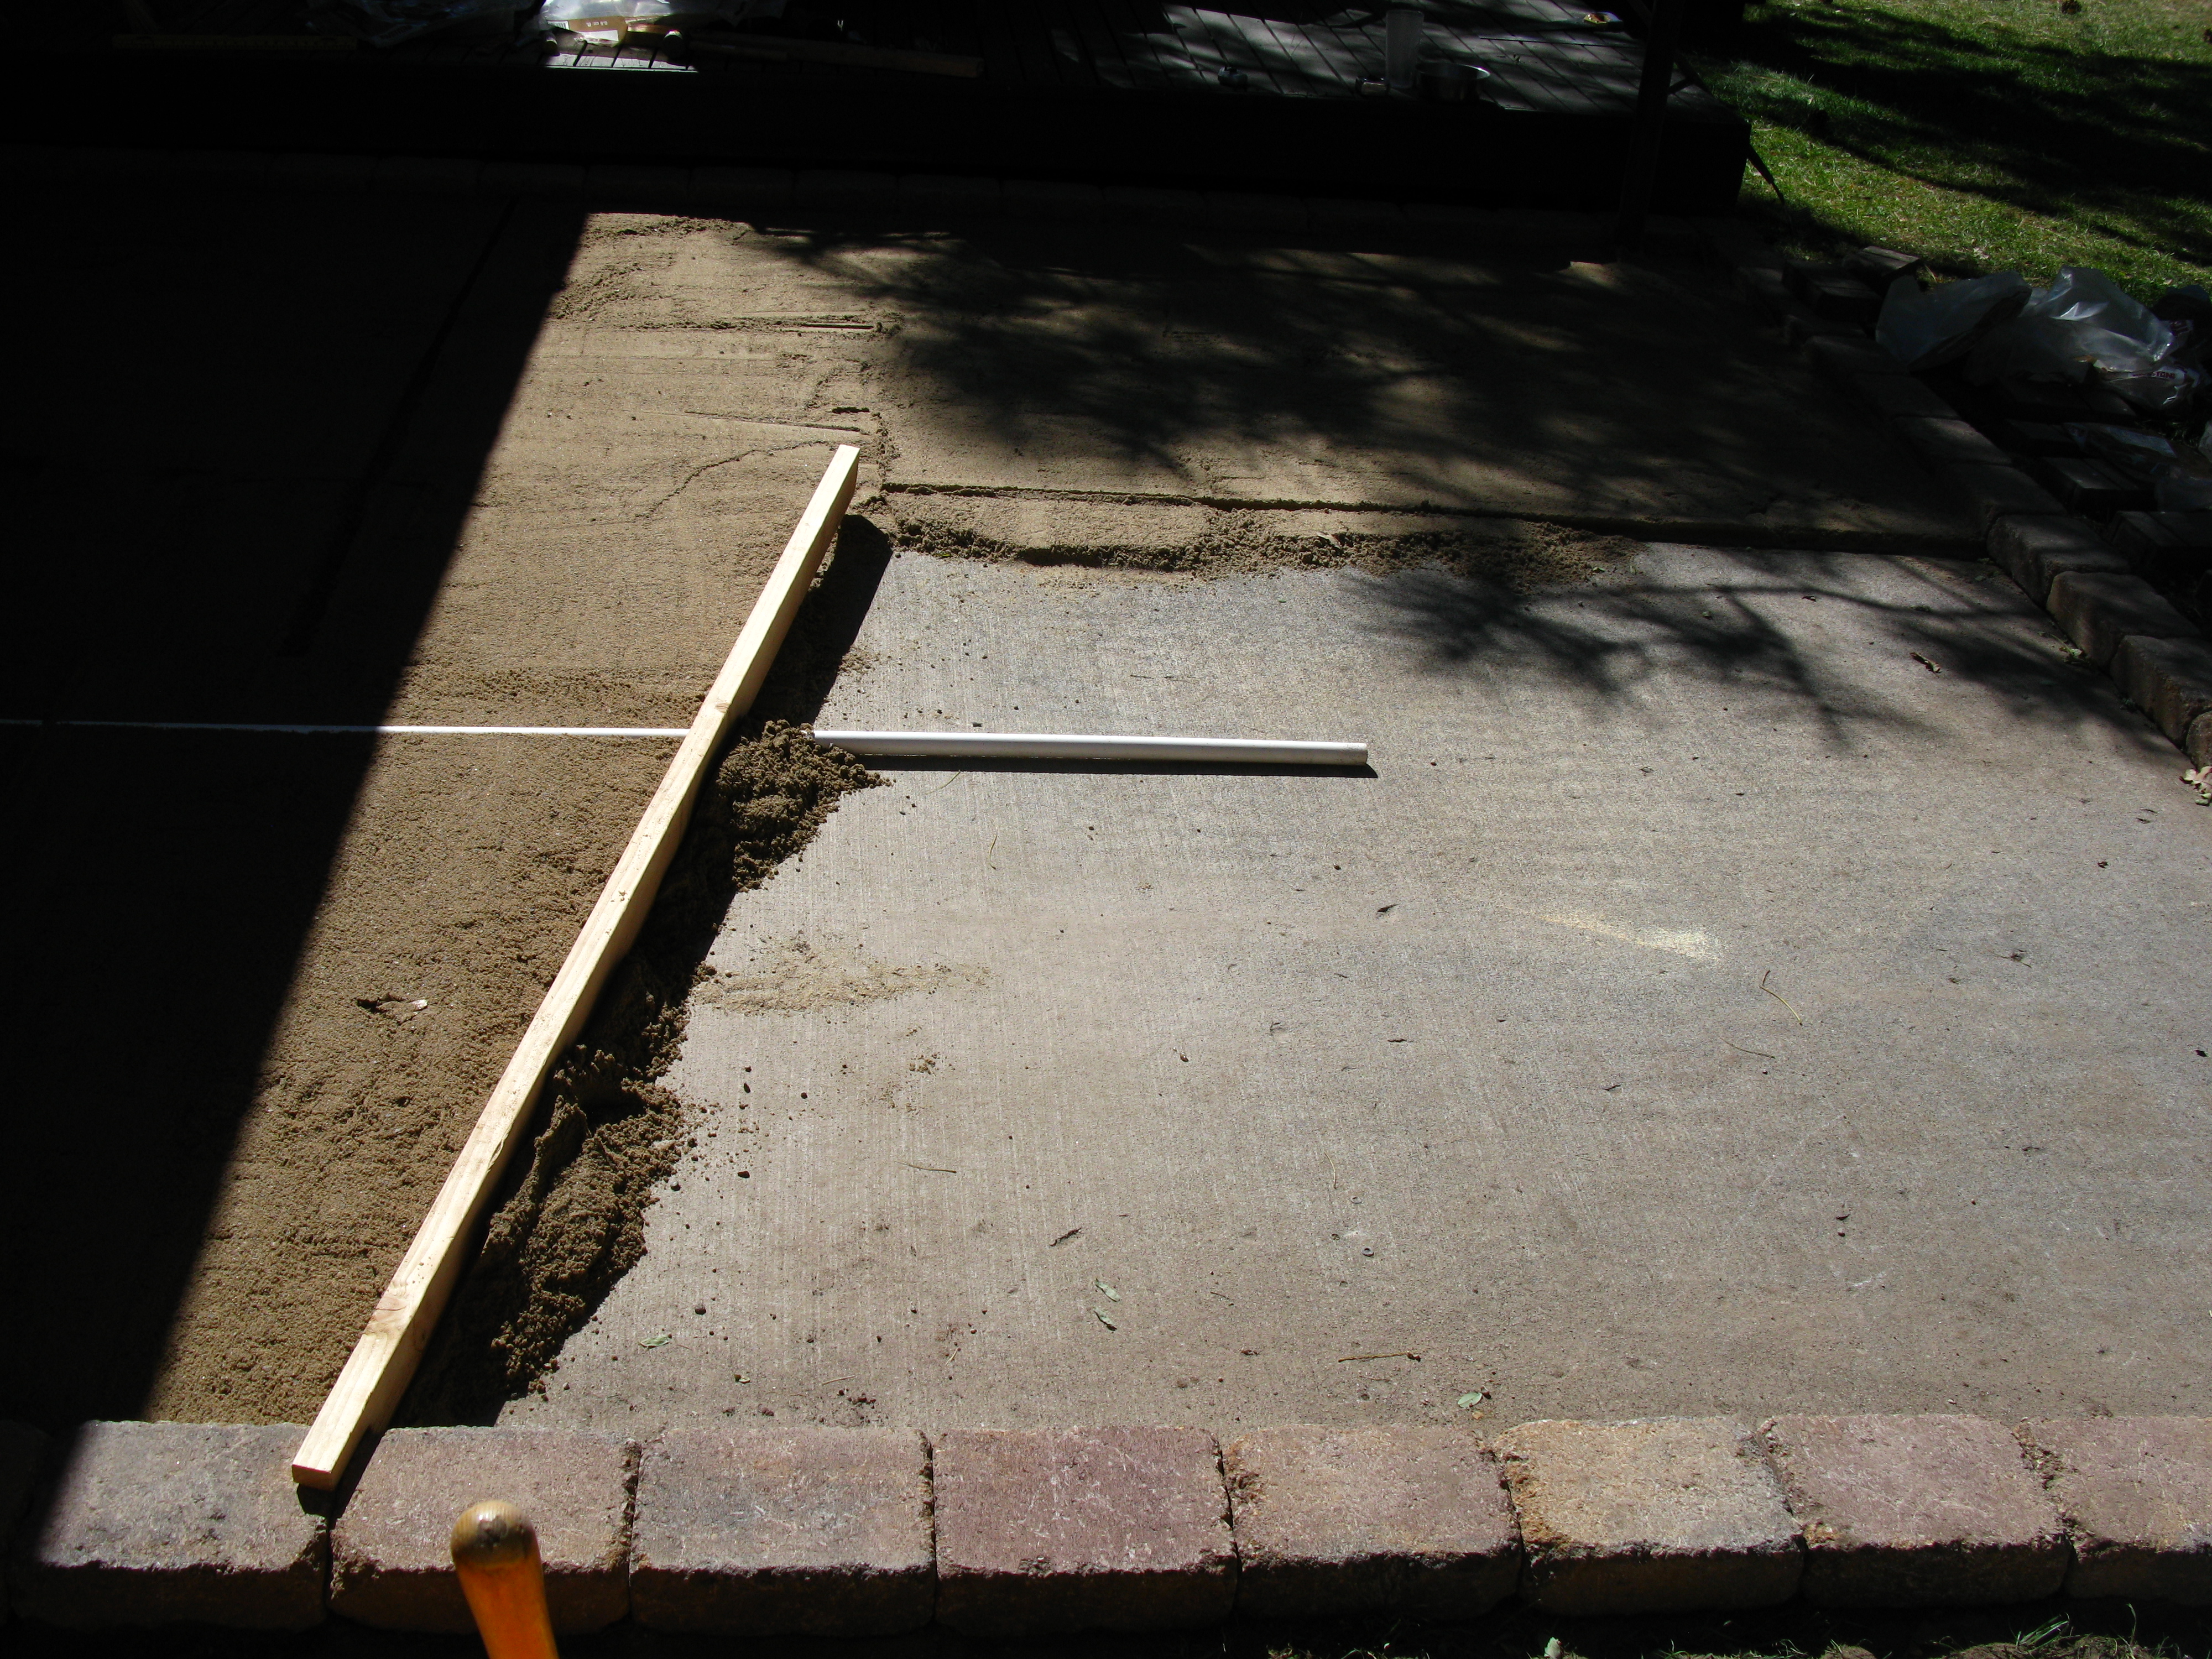
Even with the help of the 2×4 and the screed pipe, it was tough to keep the sand evenly thick, but I eventually got there. Note: The first set of directions I read online were unclear about what you do with the screed pipe once you’re done, but I eventually confirmed that you do in fact remove it and fil the gap in with sand.

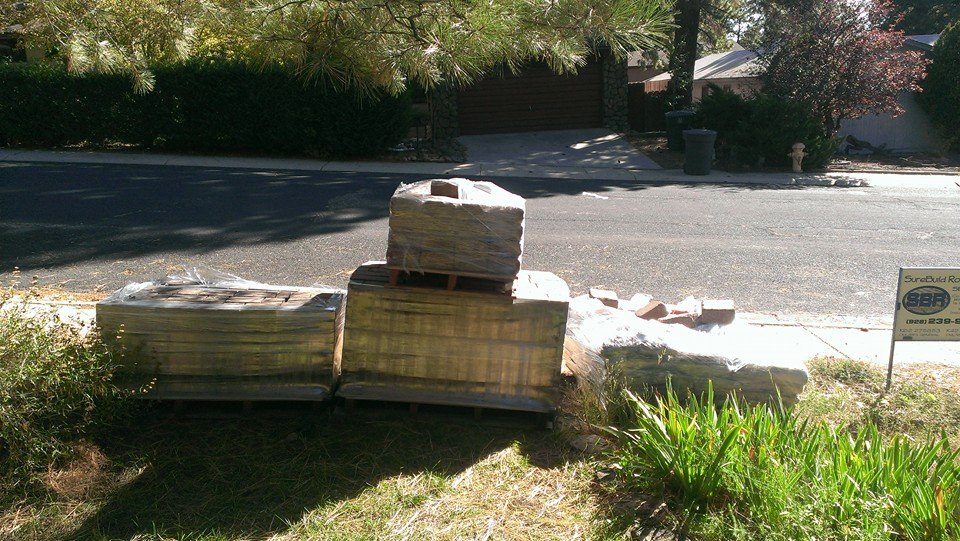
I ended up having to go buy a bunch more sand to finish off this step of the process (while I was at it, I bought a few more bricks too). My calculations had not accounted for the few bags that I used on the step area to bring it up to be slightly bulged. My philosophy in doing this was that if the step area does end up settling, this way it will settle back down to about the slab level, and if it doesn’t settle, it will still be ok, and might even help divert surface water away from the door (I found mixed information about just how much water percolates through the pavers vs running off the surface. I suspect it will mostly percolate through since I did not use polymeric sand at the end.)

Finally, everything was ready and I could start laying the bricks. I started off with grand plans of following a pattern, but those were quickly dashed. You see, the Domino pavers that we bought come in three varieties, but the pattern I had in mind assumed that there would be equal amounts of each. This turned to not to be so. The first pallet has fewer blank pavers than ones with lines in them, and the second pallet had more blank and less lined. In any case, the pavers we chose are designed to look good when just placed randomly, so that’s what I tried to do.

One word of advice, when placing pavers “randomly”, it’s still easy to end up with ling straight lines formed by the edges of the pavers. Just watch out for these and mix up the orientation of the pavers a bit more to avoid these lines that can draw the eye and don’t look good.

IMG_9999

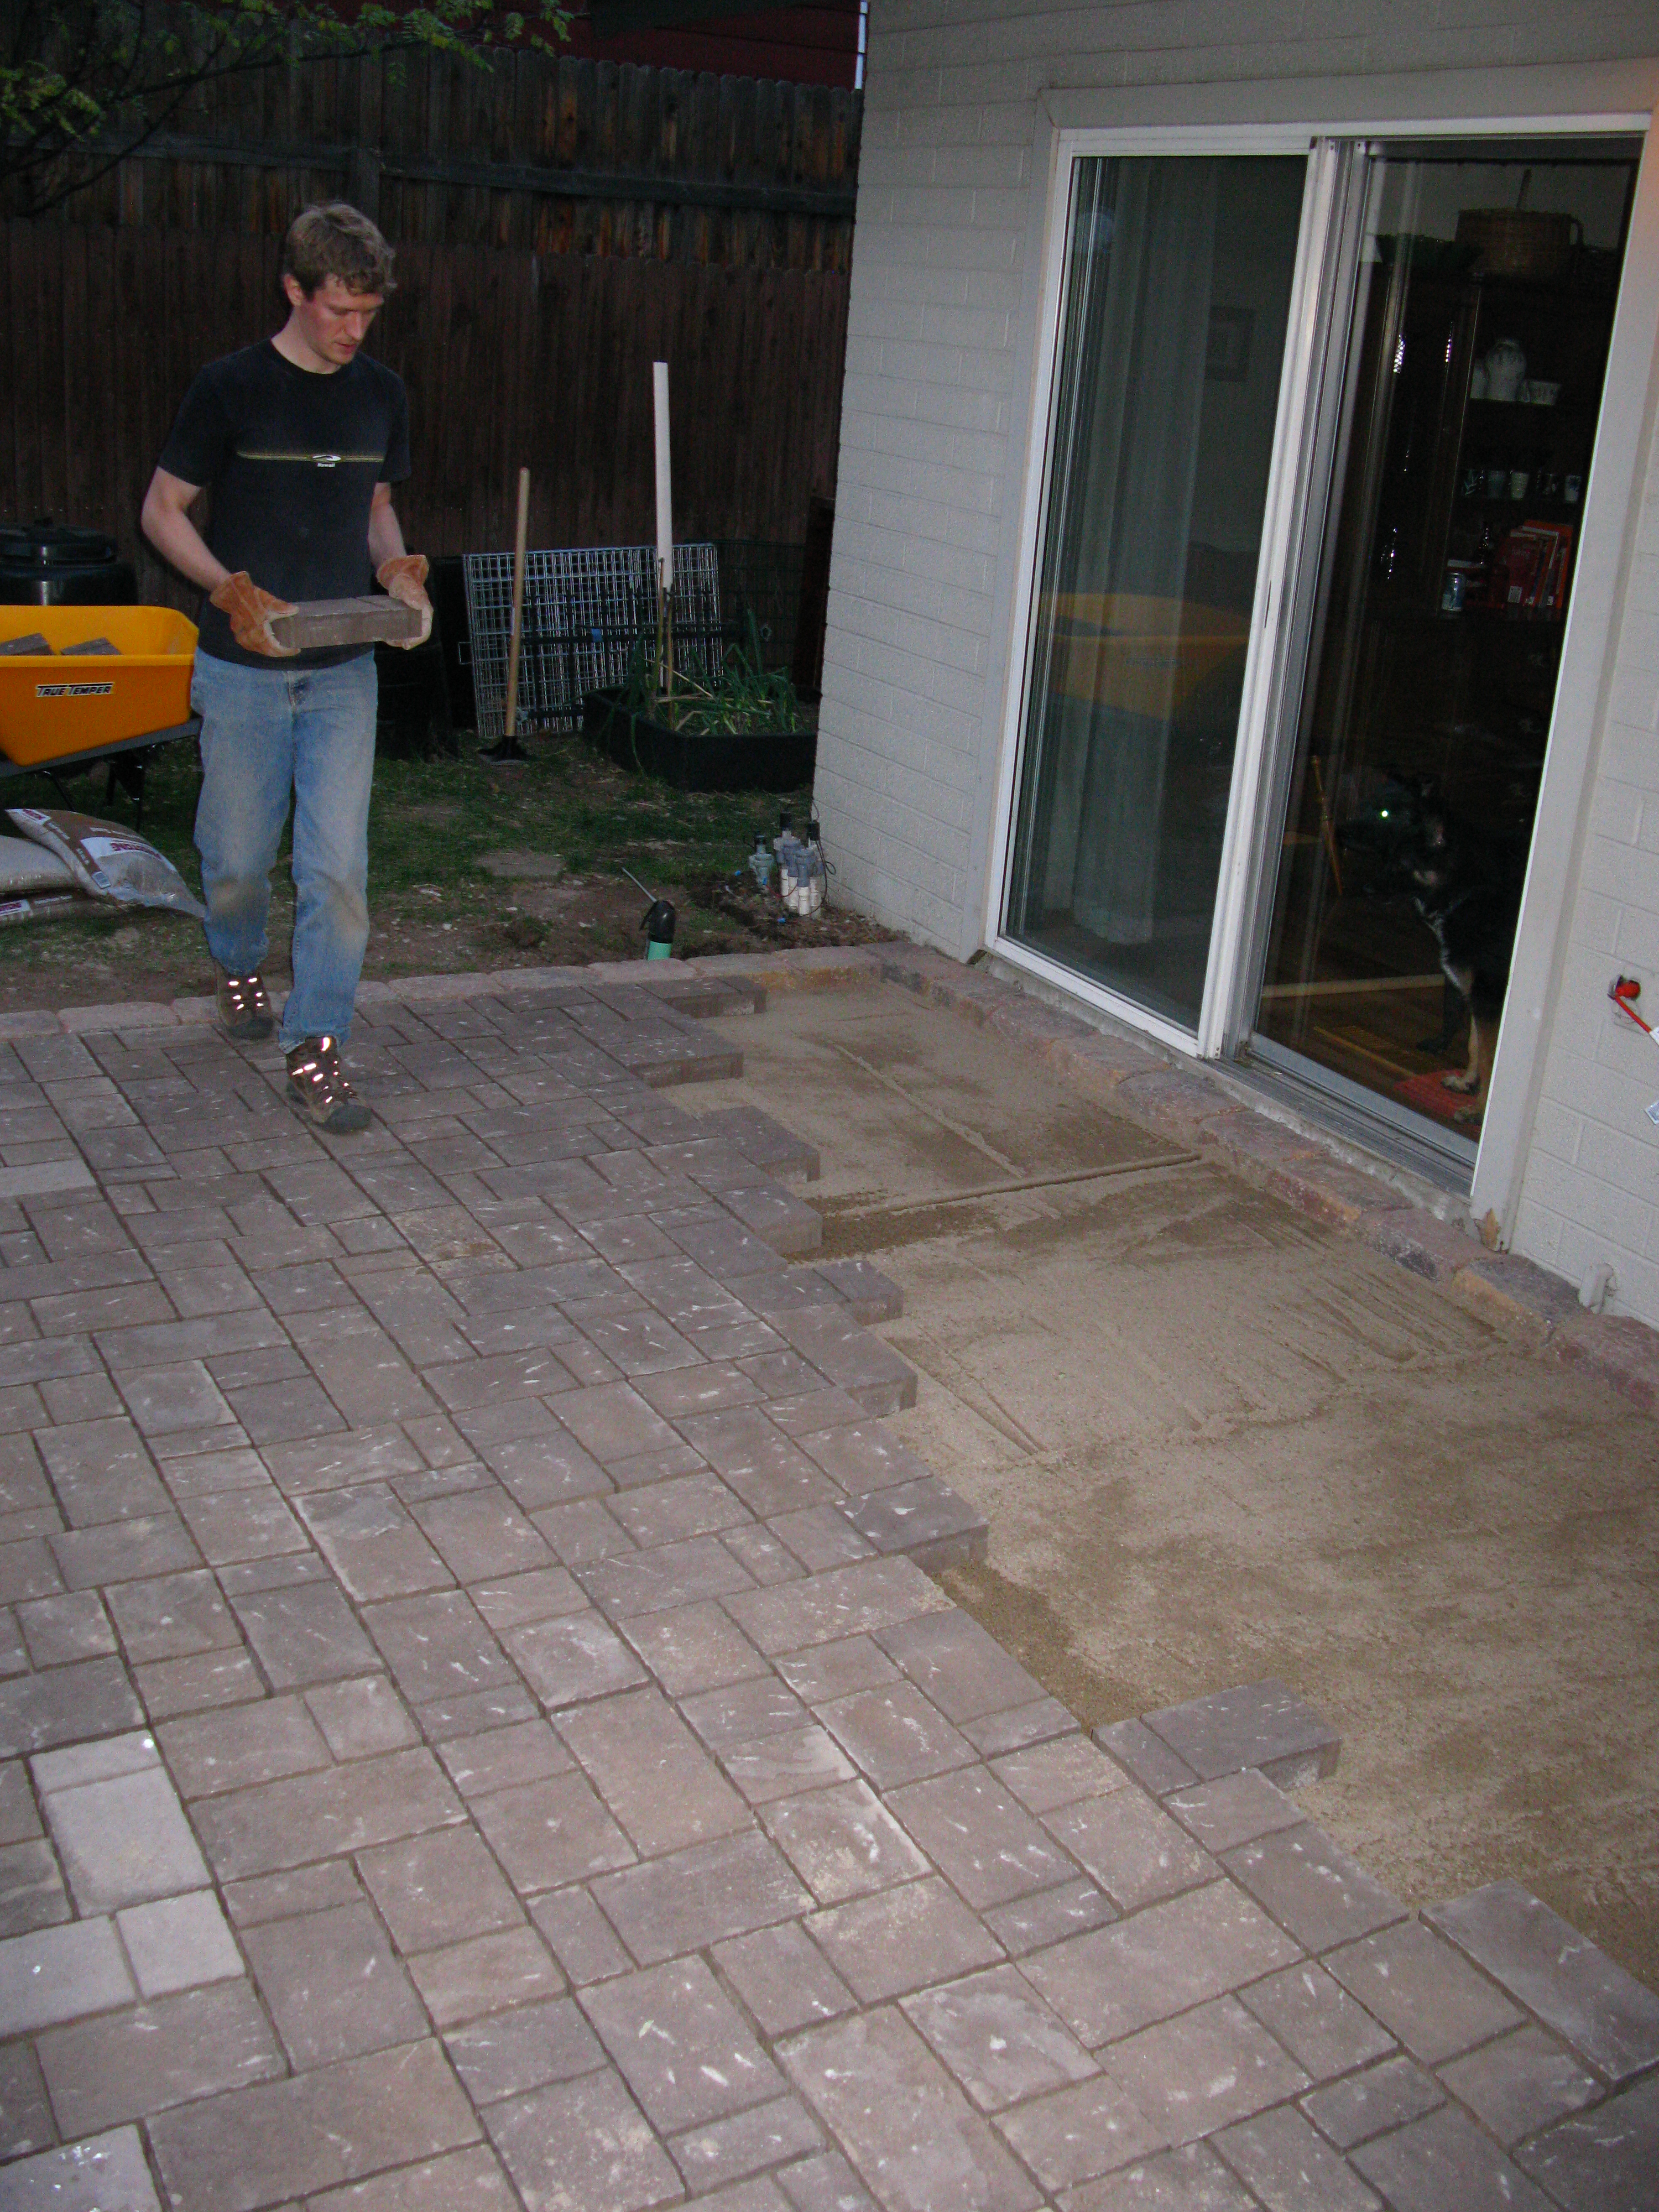
Somehow I thought placing the pavers would go quickly, but with just me working on it, it took all afternoon into the evening. I had to take a break to eat dinner, and then continue for another half an hour to finish things up. Here’s what it looked like the next morning:

IMG_0005

You’ll notice that the final row of pavers are not in place. That’s because these are the ones that needed to be cut, and, just my luck, the government shutdown ended and it was time for me to get back to work. The kind where I get to slouch in an office chair all day instead of carrying bricks all day. My muscles were grateful for the rest! We ended up doing the cutting the following saturday.

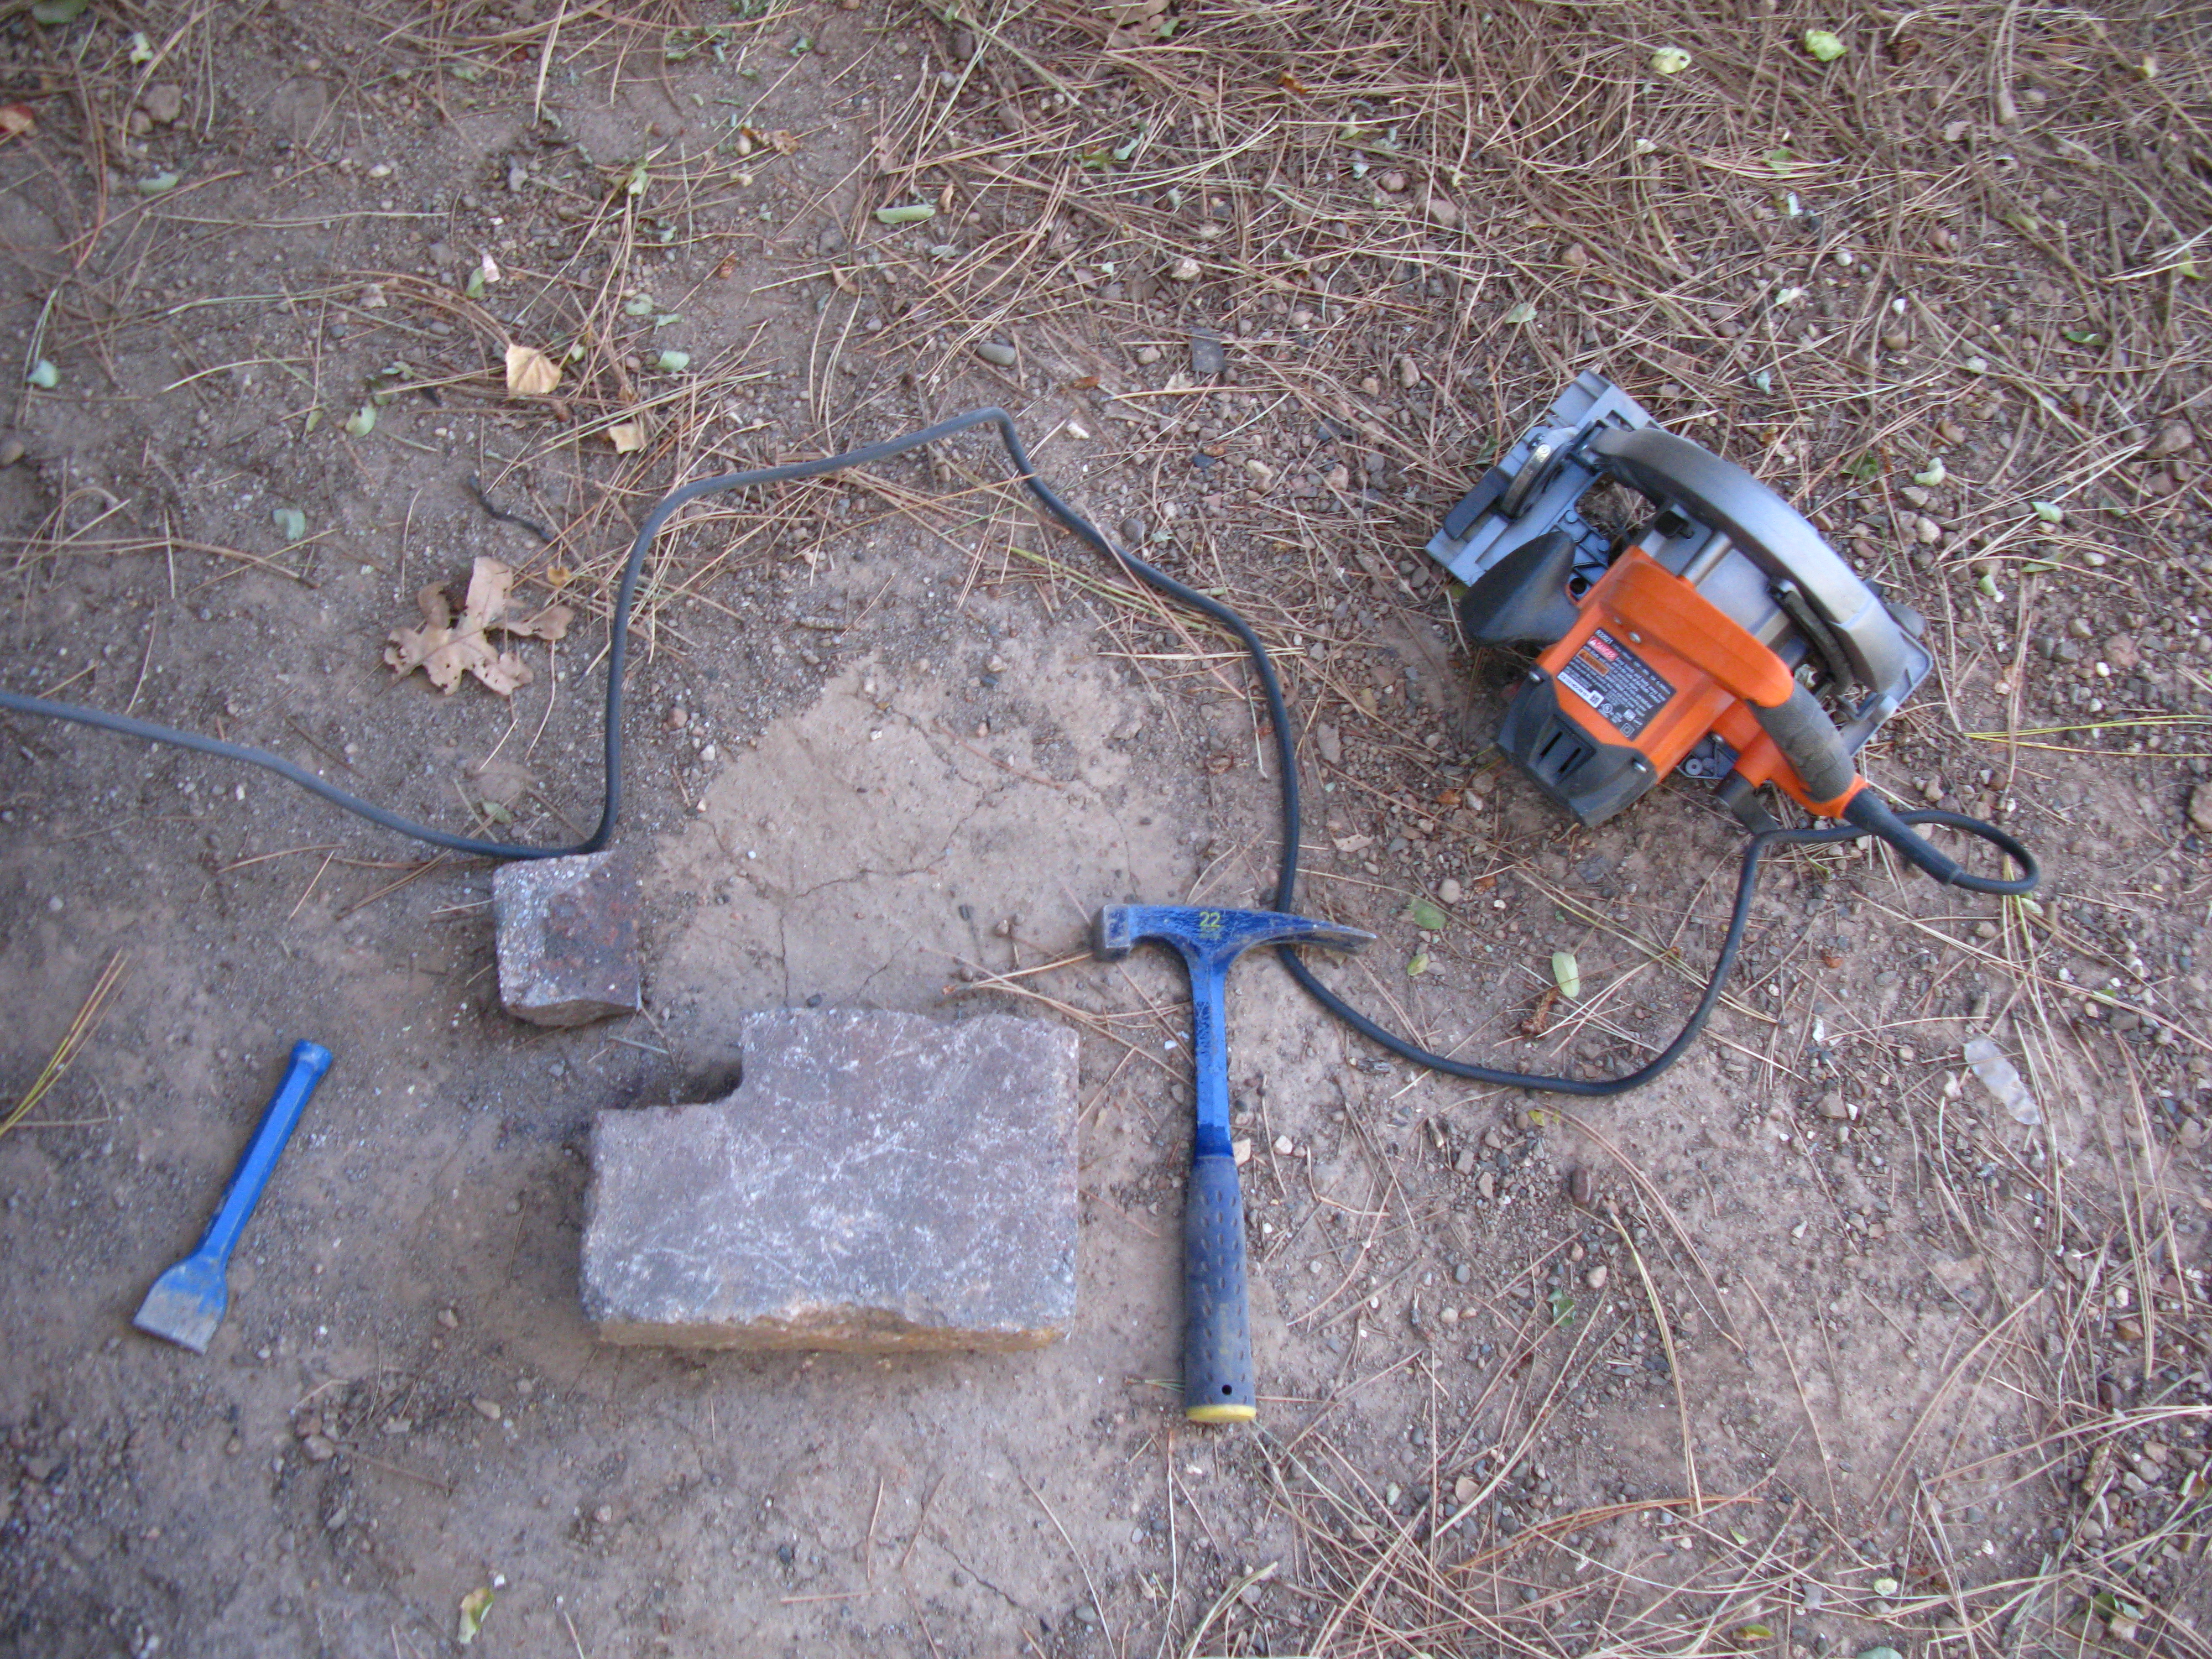
I didn’t want to rent an expensive diamond bladed, water-cooled masonry saw at Home Depot for such a small number of cuts, so instead I opted to just use masonry blades on my circular saw. it was much slower, but much cheaper. It would have taken forever to cut cleanly through each and every brick, so instead I measured them, then scored each side with the saw and tapped it with the chisel until it broke.

IMG_0041

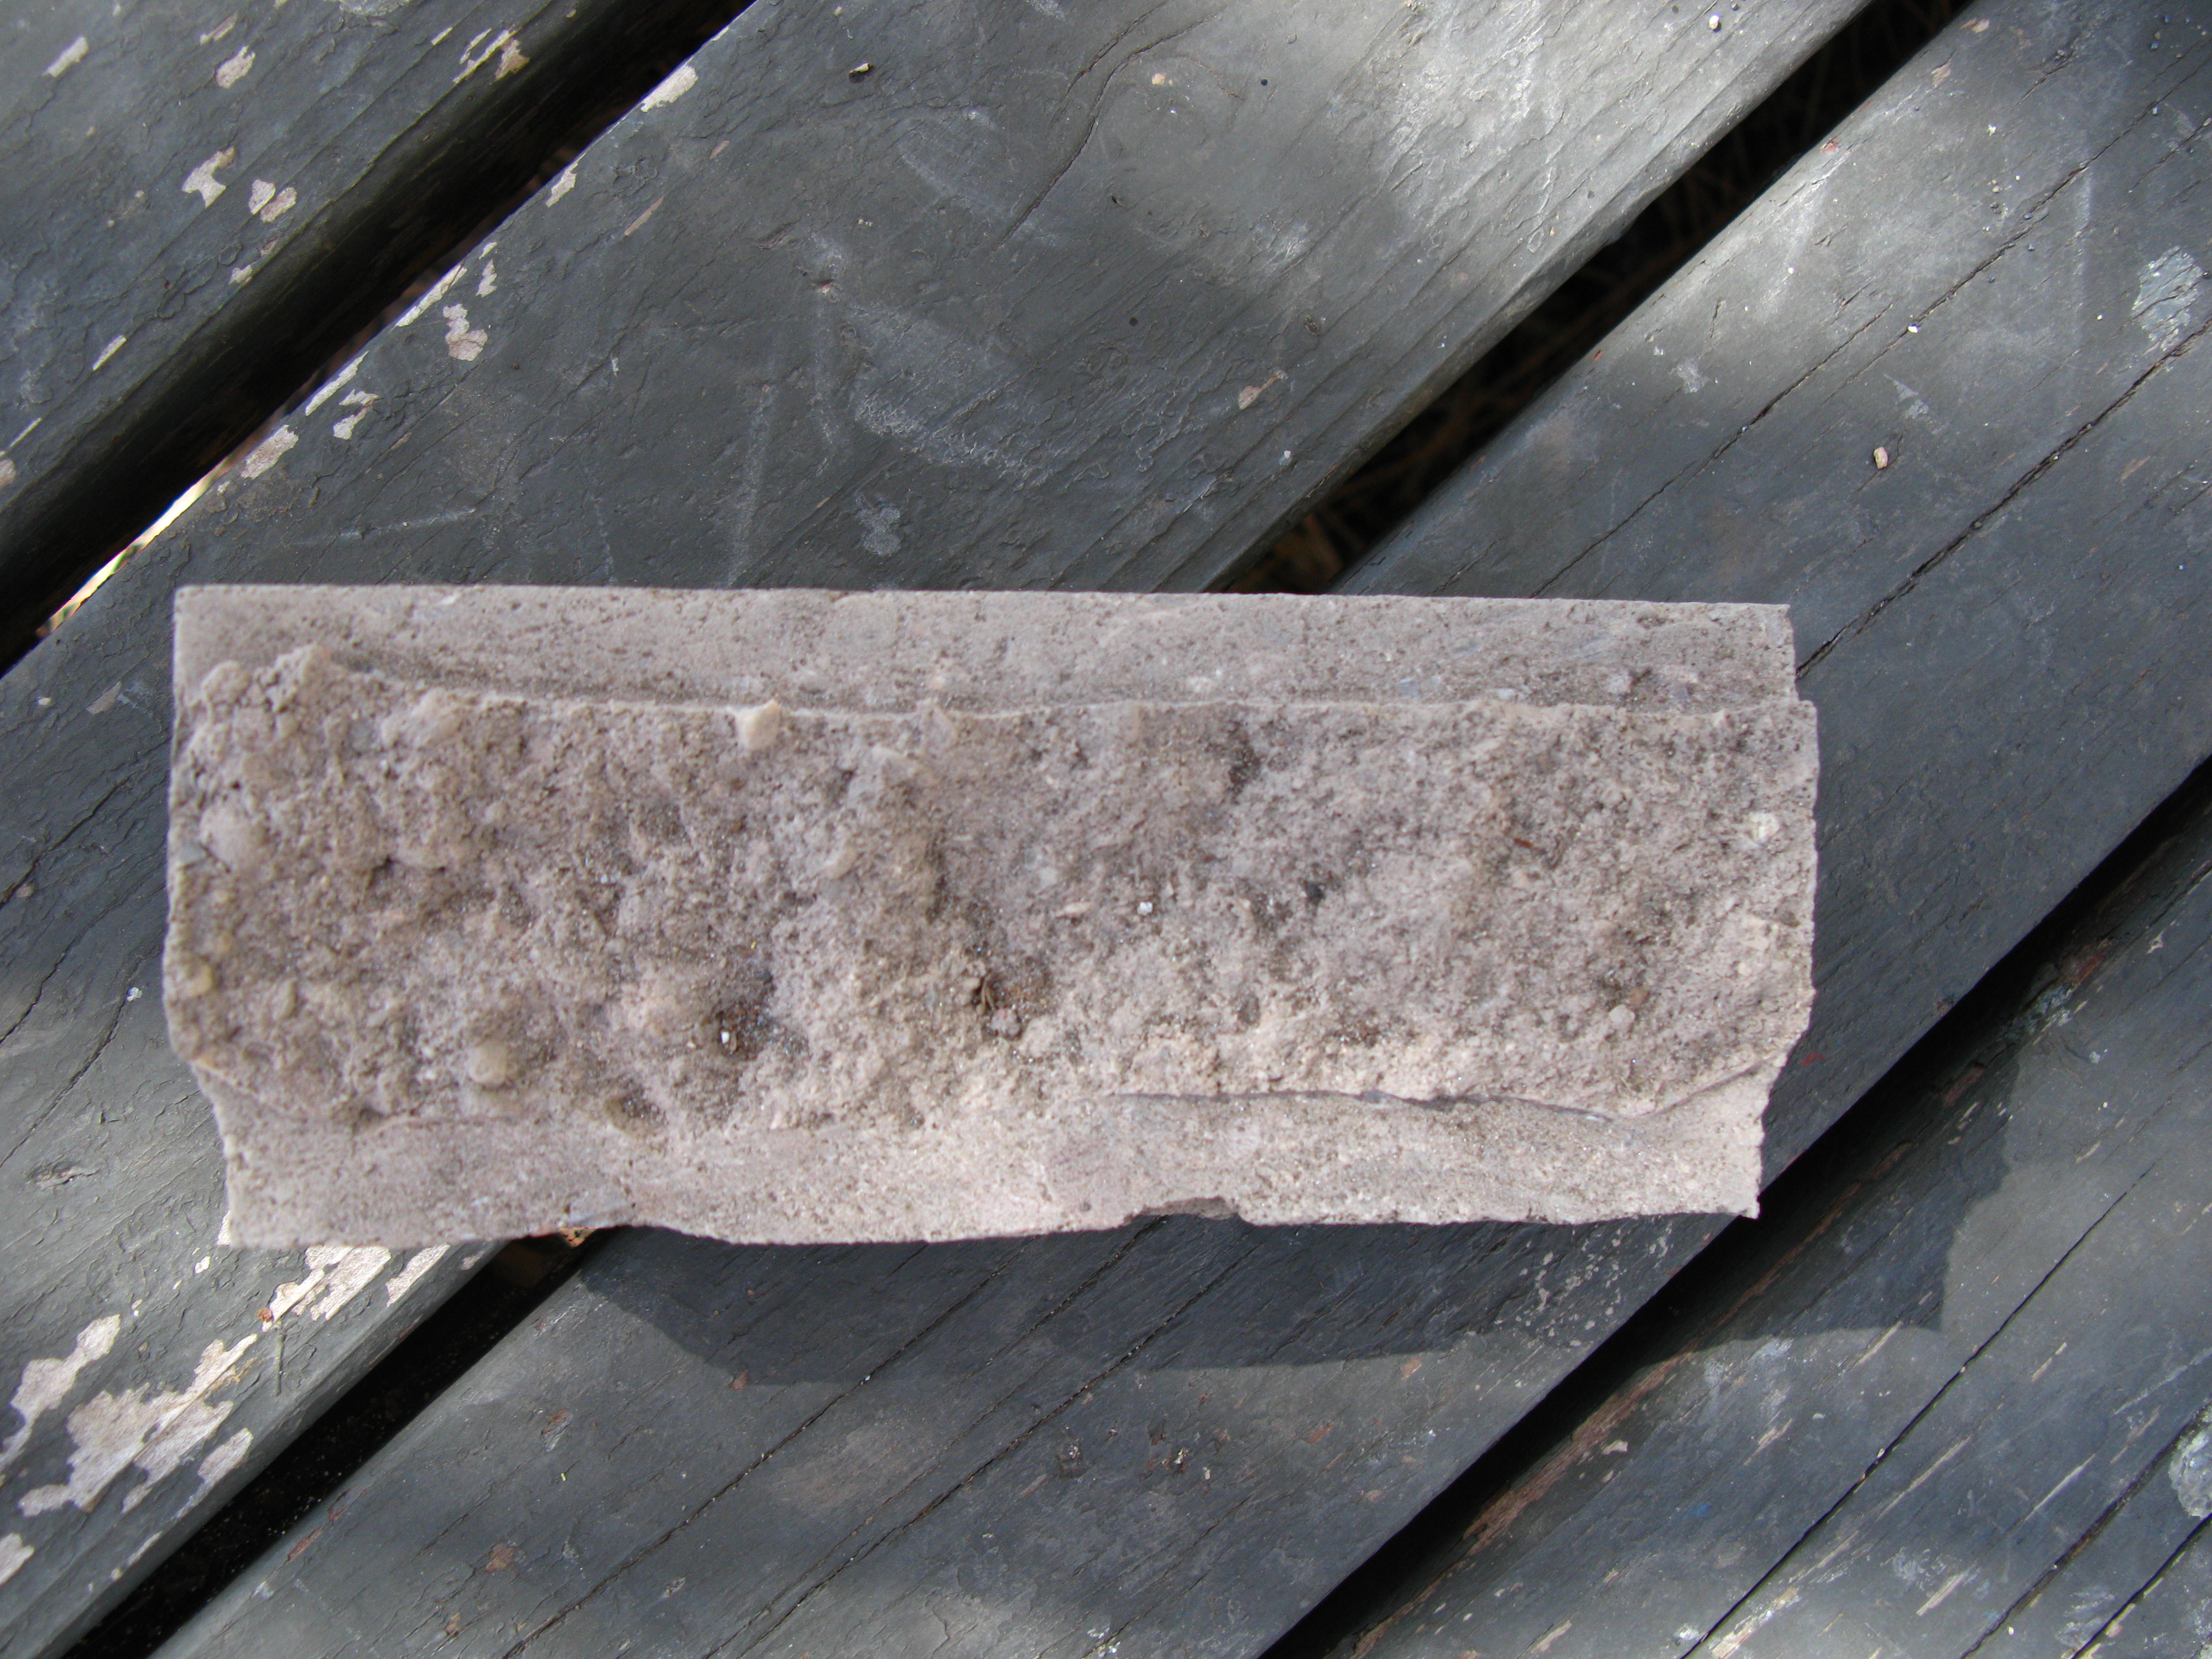
This process took some practice: for a while, when the brick broke, it would leave a knobby bumpy surface sticking out that I had to either saw or chisel off. The good thing about this was that my cut bricks had an extremely tight fit but on the down side, it took a while (in most cases, lots of pounding with the rubber mallet, alternating with chiseling the ragged edge some more, was necessary).  The first major lesson that I learned was that it is much better to cut in the short direction along the brick than the long dimension.

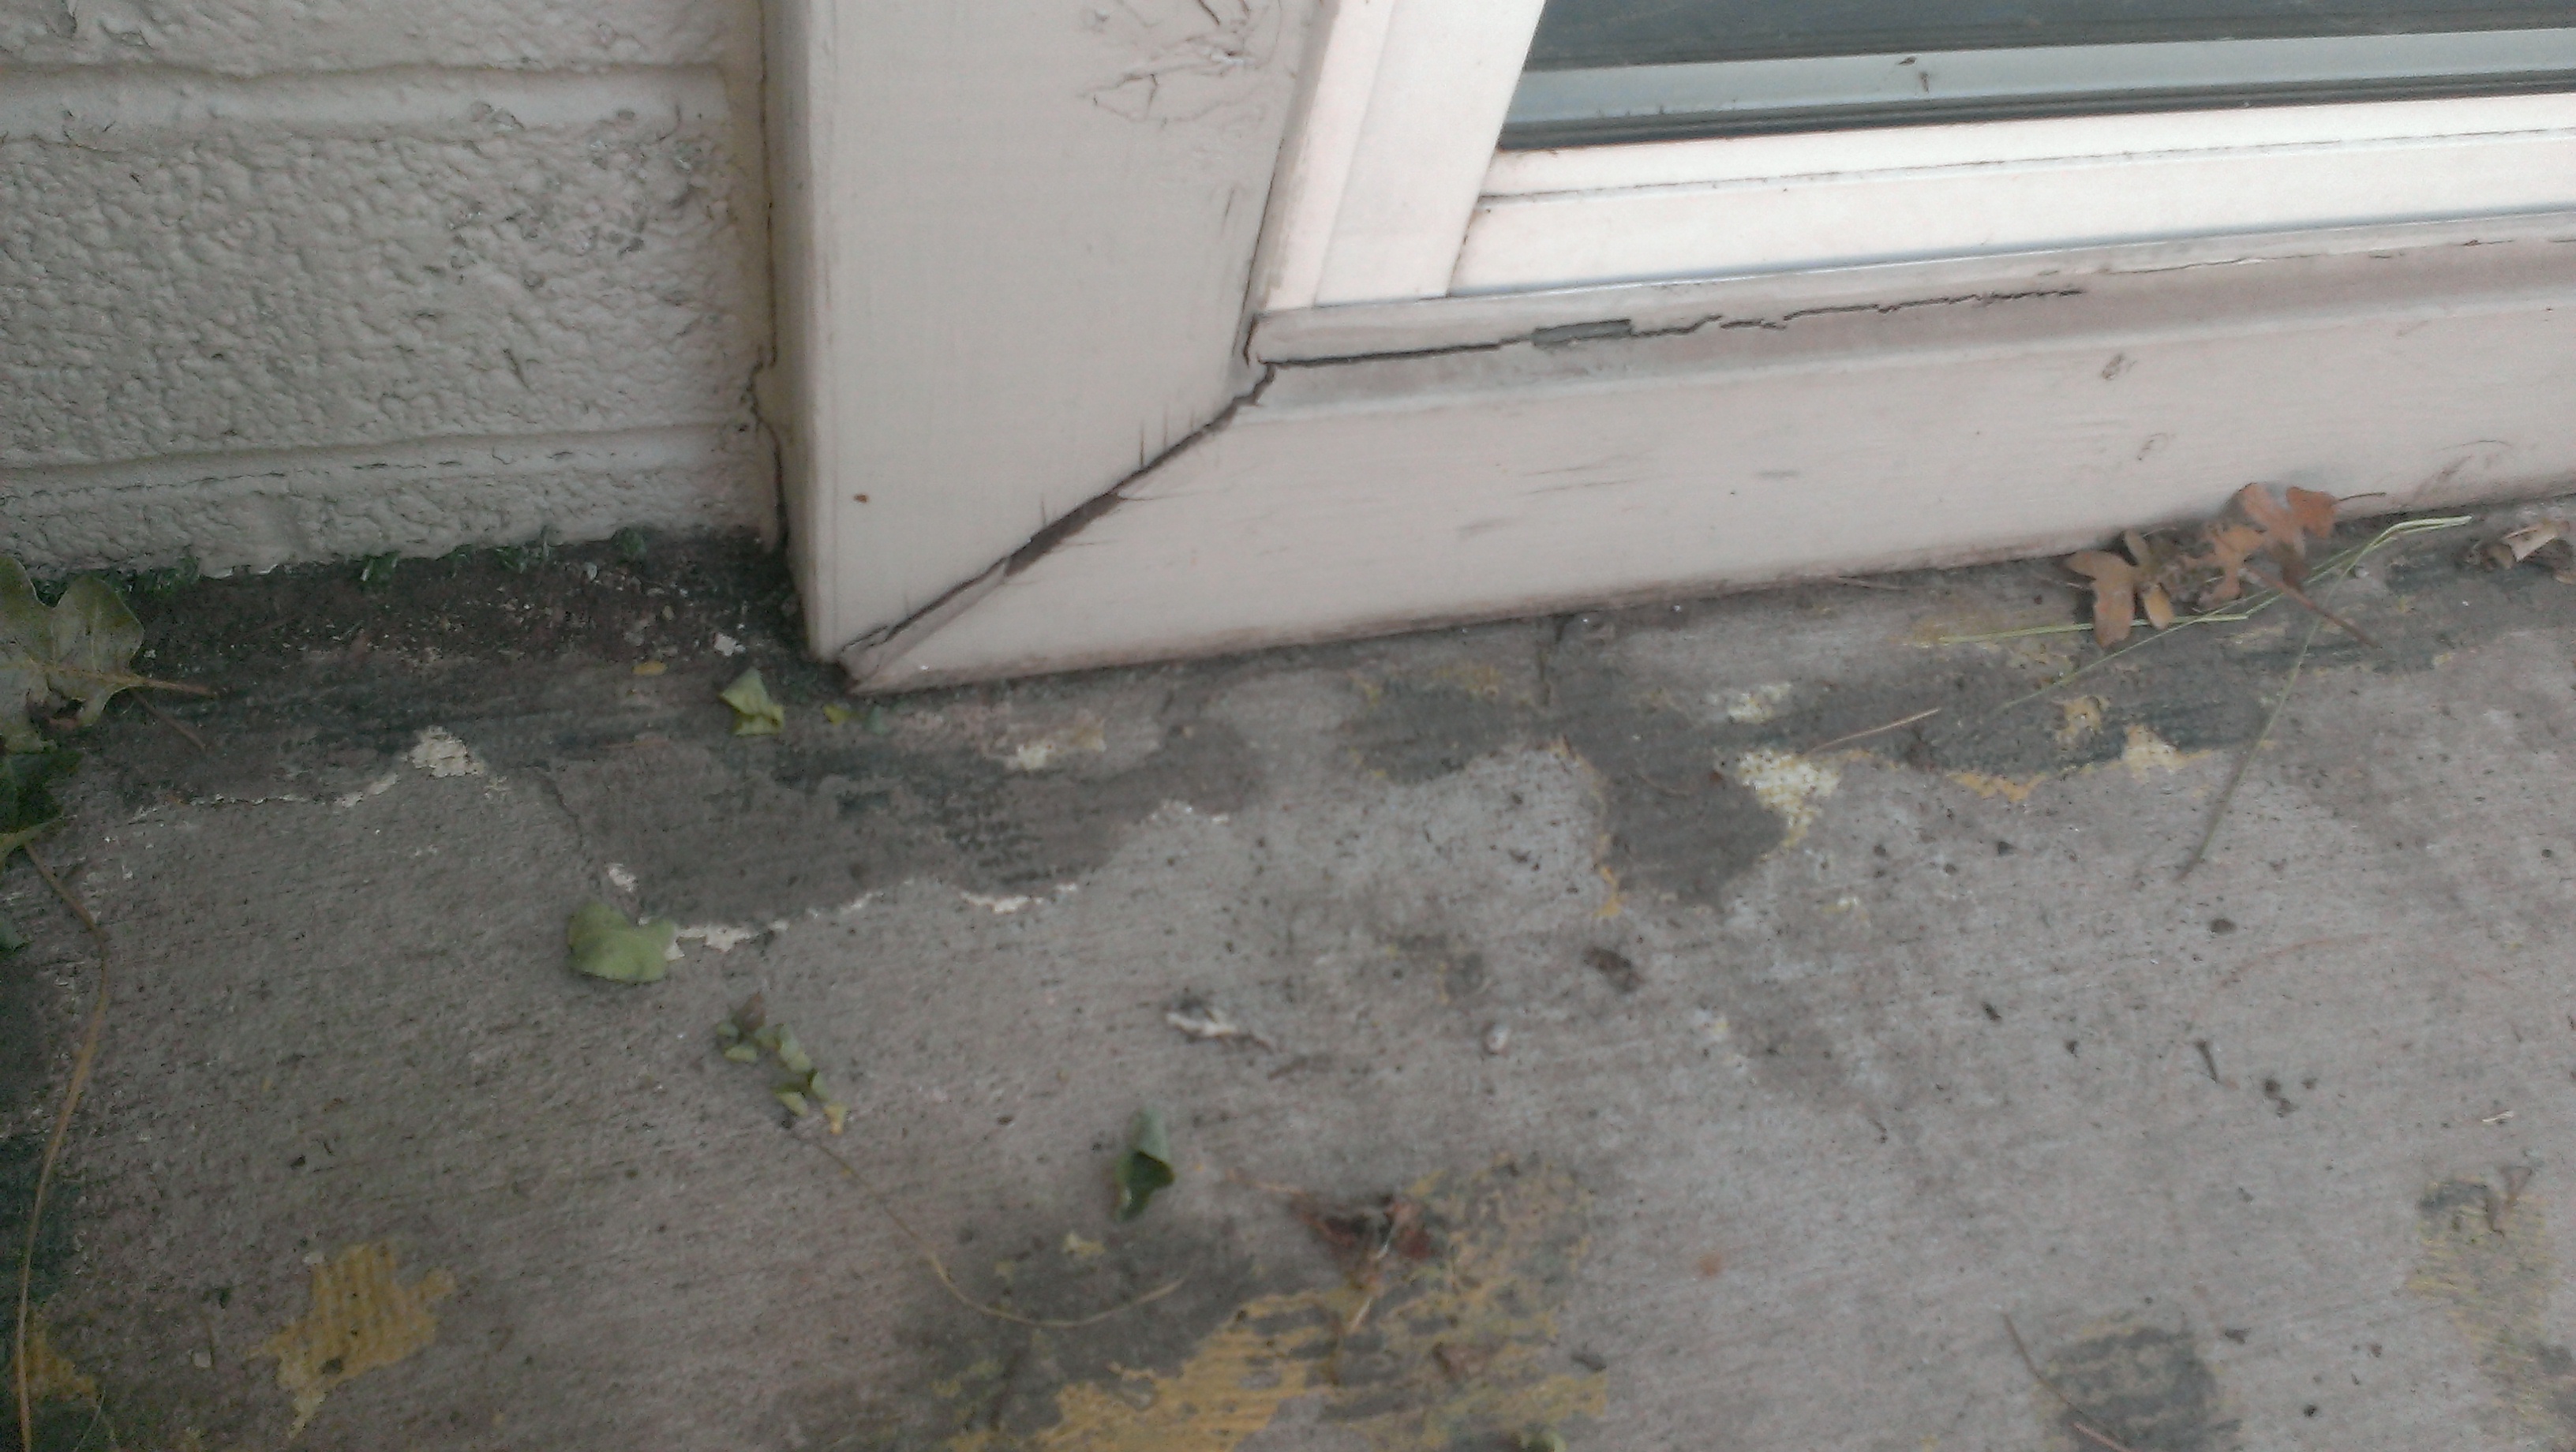
“But wait,” you say, “doesn’t that mean that you can’t have any long pieces along the border near the house?” At first I thought so, but then I realized that I can place an uncut brick with the long side along the border, and then put two cut bricks abutting that one. Here’s what I mean:

Notice that I didn't cut the brick that has its long edge along the border. Instead I cut the two bricks that abut this one. (The dark gaps are where our first round of sand has settled in the cracks between bricks.)

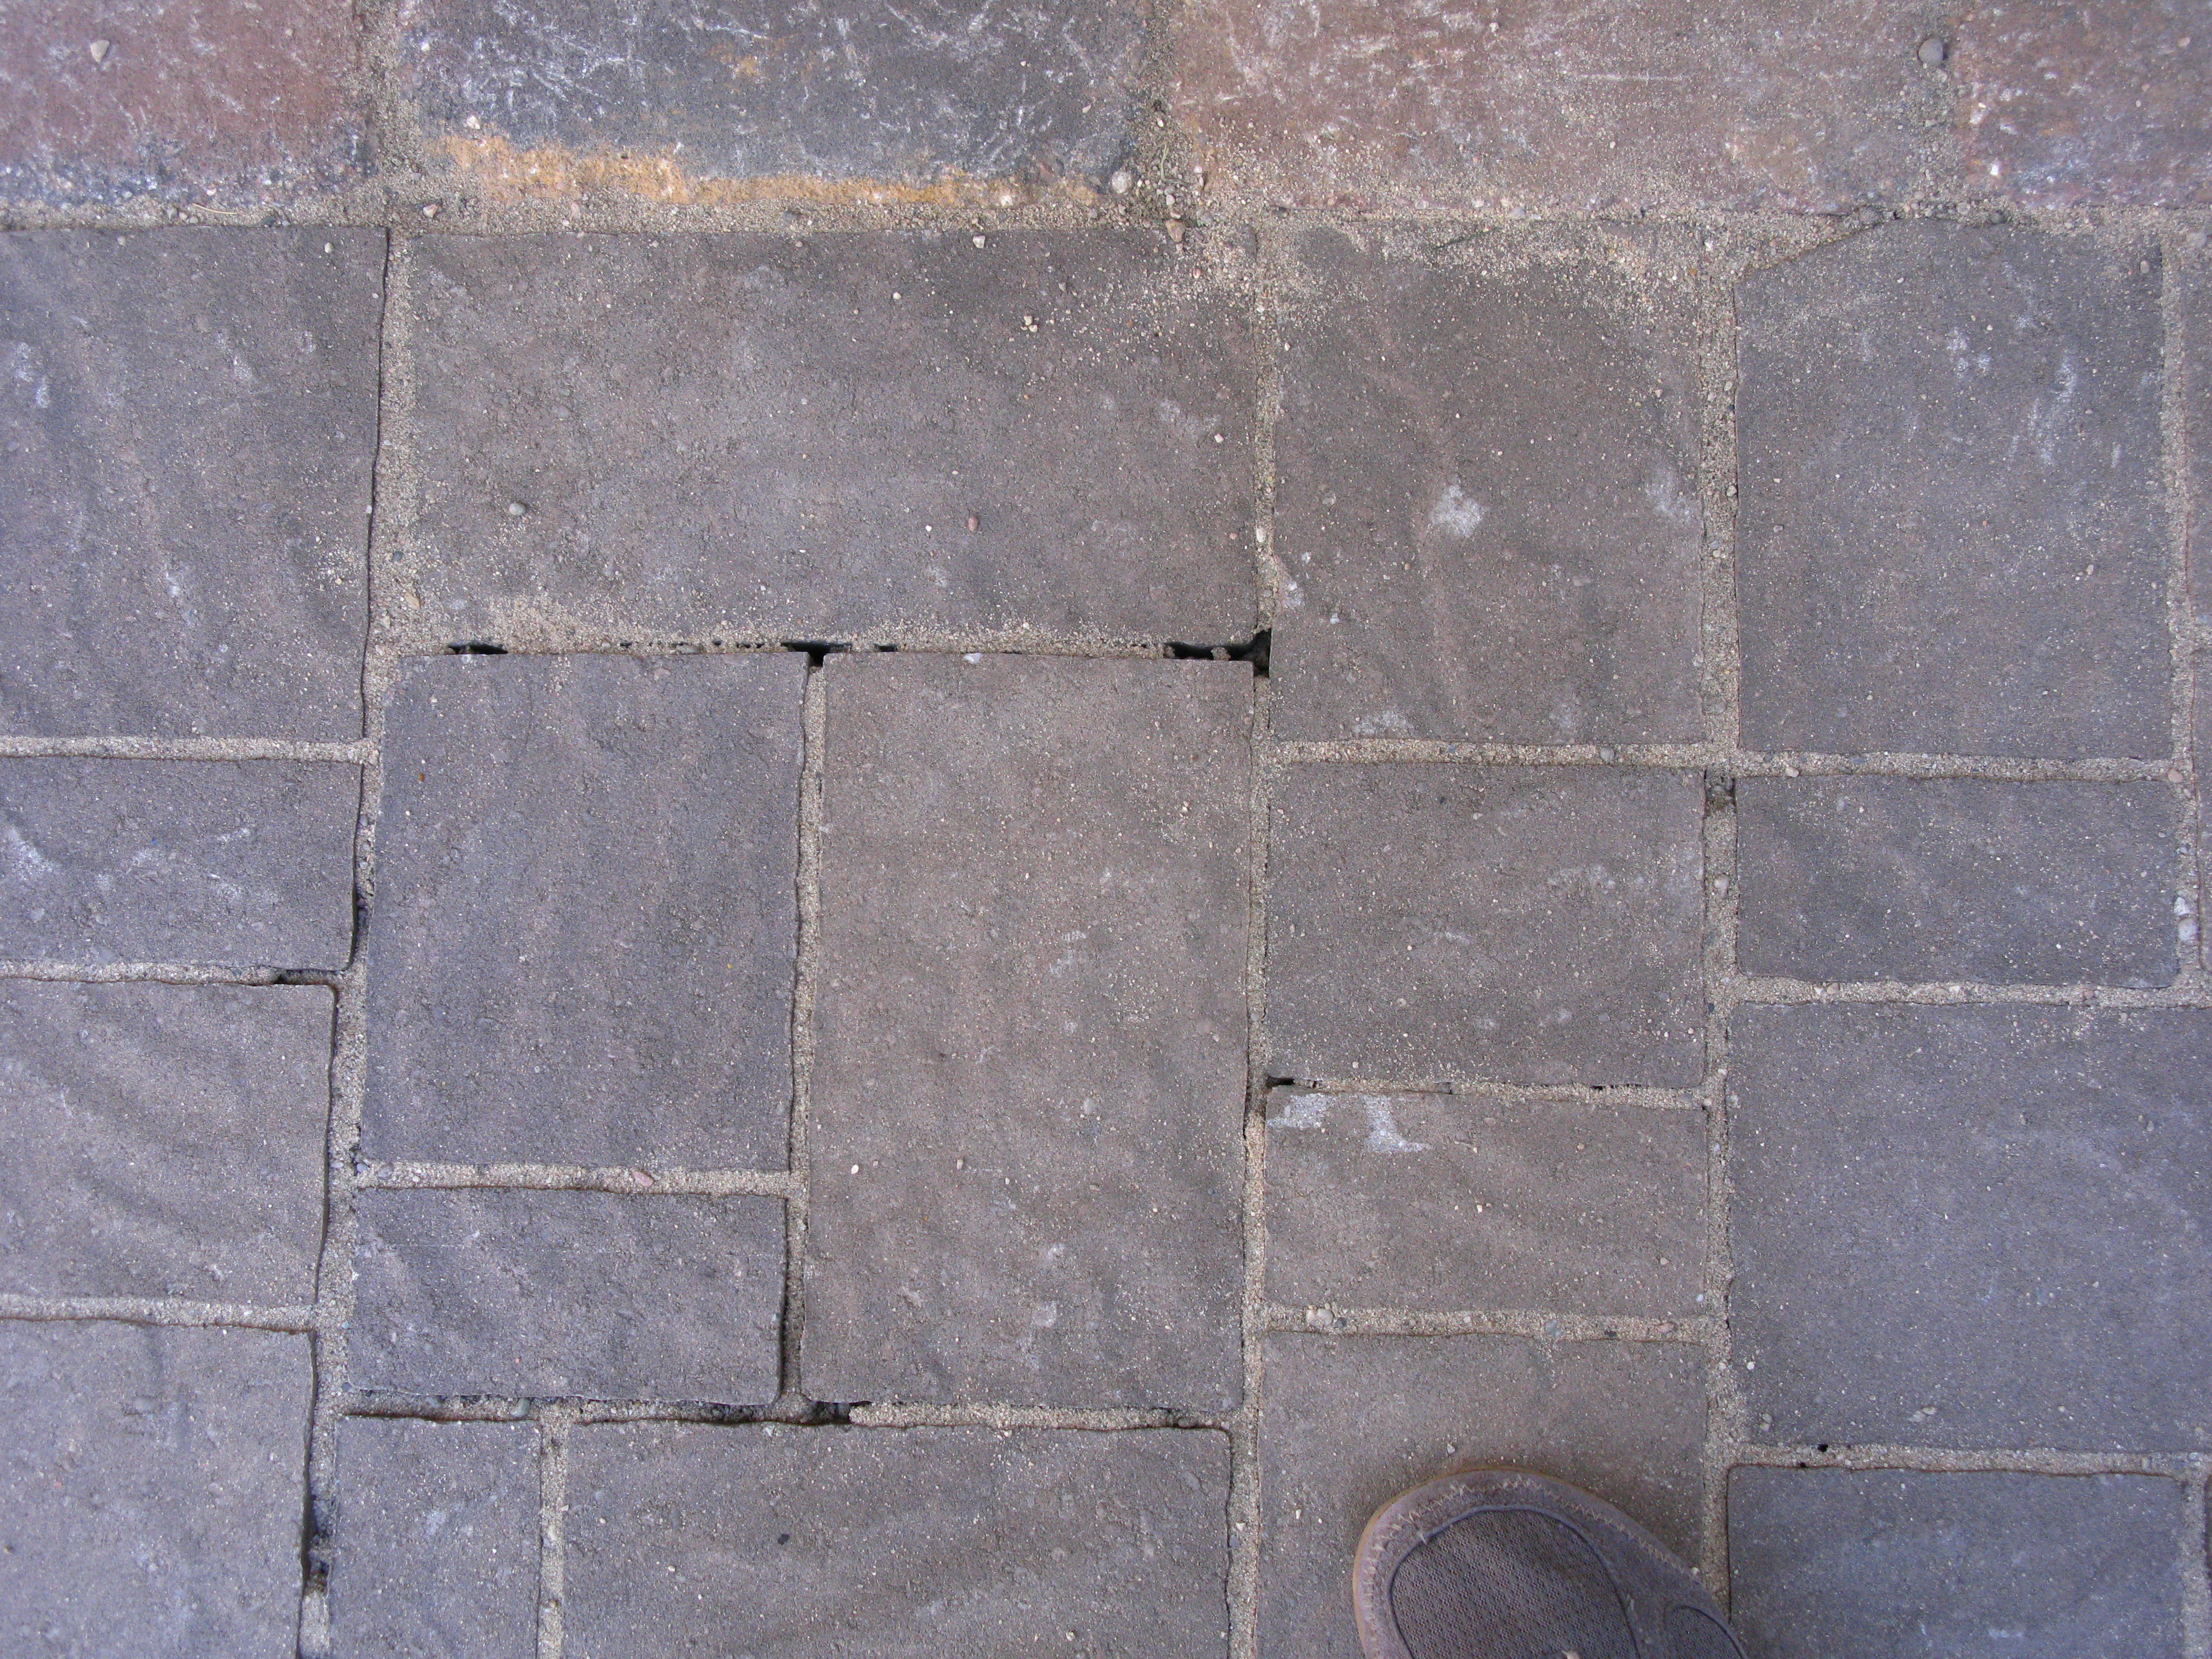
Notice that I didn’t cut the brick that has its long edge along the border. Instead I cut the two bricks that abut this one. (The dark gaps are where our first round of sand has settled in the cracks between bricks.)

Also, be warned: masonry blades wear out pretty quickly. I went through two and a half blades just cutting the pavers along one edge of the patio, and not even cutting them all the way through. If you have lots of cutting to do, then it’s definitely worth it to rent the proper tool.

These masonry blades started out 7 inches in diameter!

These masonry blades started out 7 inches in diameter!

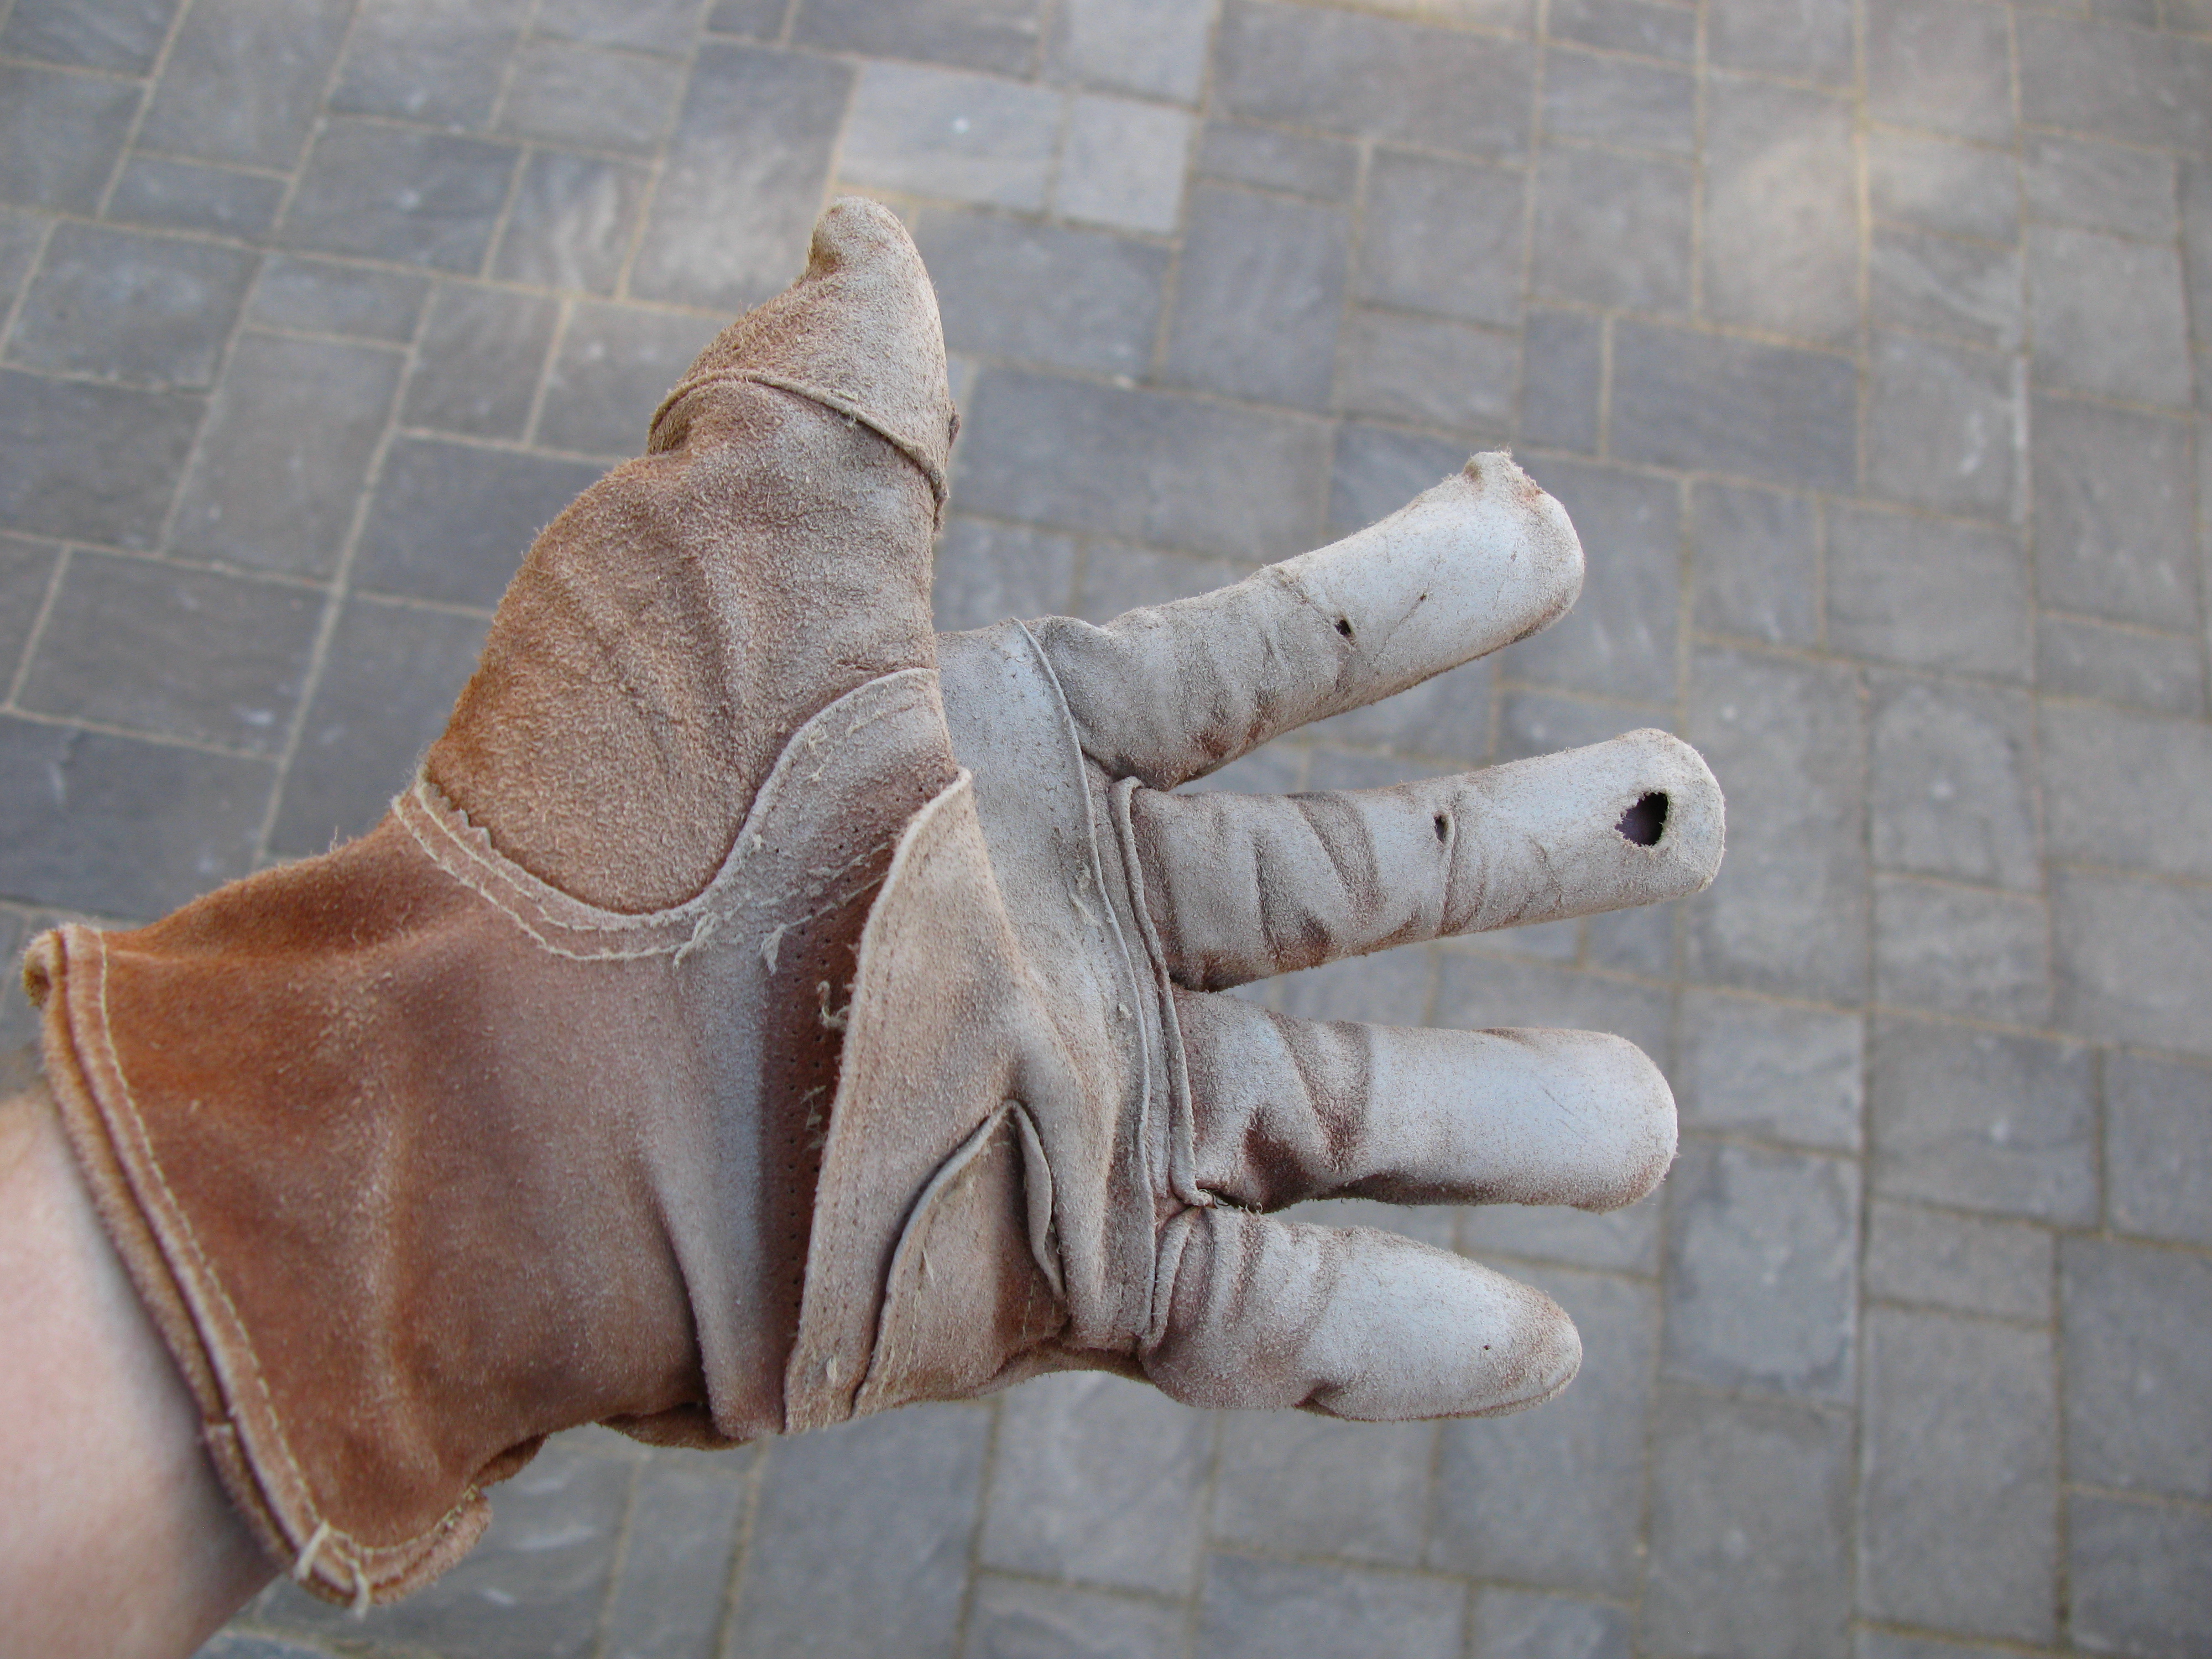
Speaking of wearing things out (other than my poor innocent muscles), I should show you this picture of my gloves. They were basically destroyed by the end of the project so, word to the wise: wear gloves for a project like this, and count on them getting pretty worn out by the end!

IMG_0020

It took a long time, but I finally slid the last cut brick into place about 10 minutes before we were expecting guests over for a pumpkin carving party on our deck/patio. While I had been cutting, my wife swept sand into all the joints, beginning the process of locking the bricks in place.

IMG_0016

It turned out that we didn’t quite have enough sand to fill in the joints, but it will only take a couple more bags to finish the job.

In theory, the finishing step is to rent a plate compactor and pound the pavers into the underlying sand, and really work the sand into the joints, locking everything in place. We are leaning toward not doing this. The cement slab provides a nice firm footing for the pavers, and the final bags of sand will work their way into the joints with normal use over time. Also, we’re just not keen on renting a giant expensive machine and luring friends over to help us maneuver the thing in and out of the car, probably hurting someone in the process. We might regret skipping this step down the road, and if so I’ll post an update saying so, but for now we will risk going without it.

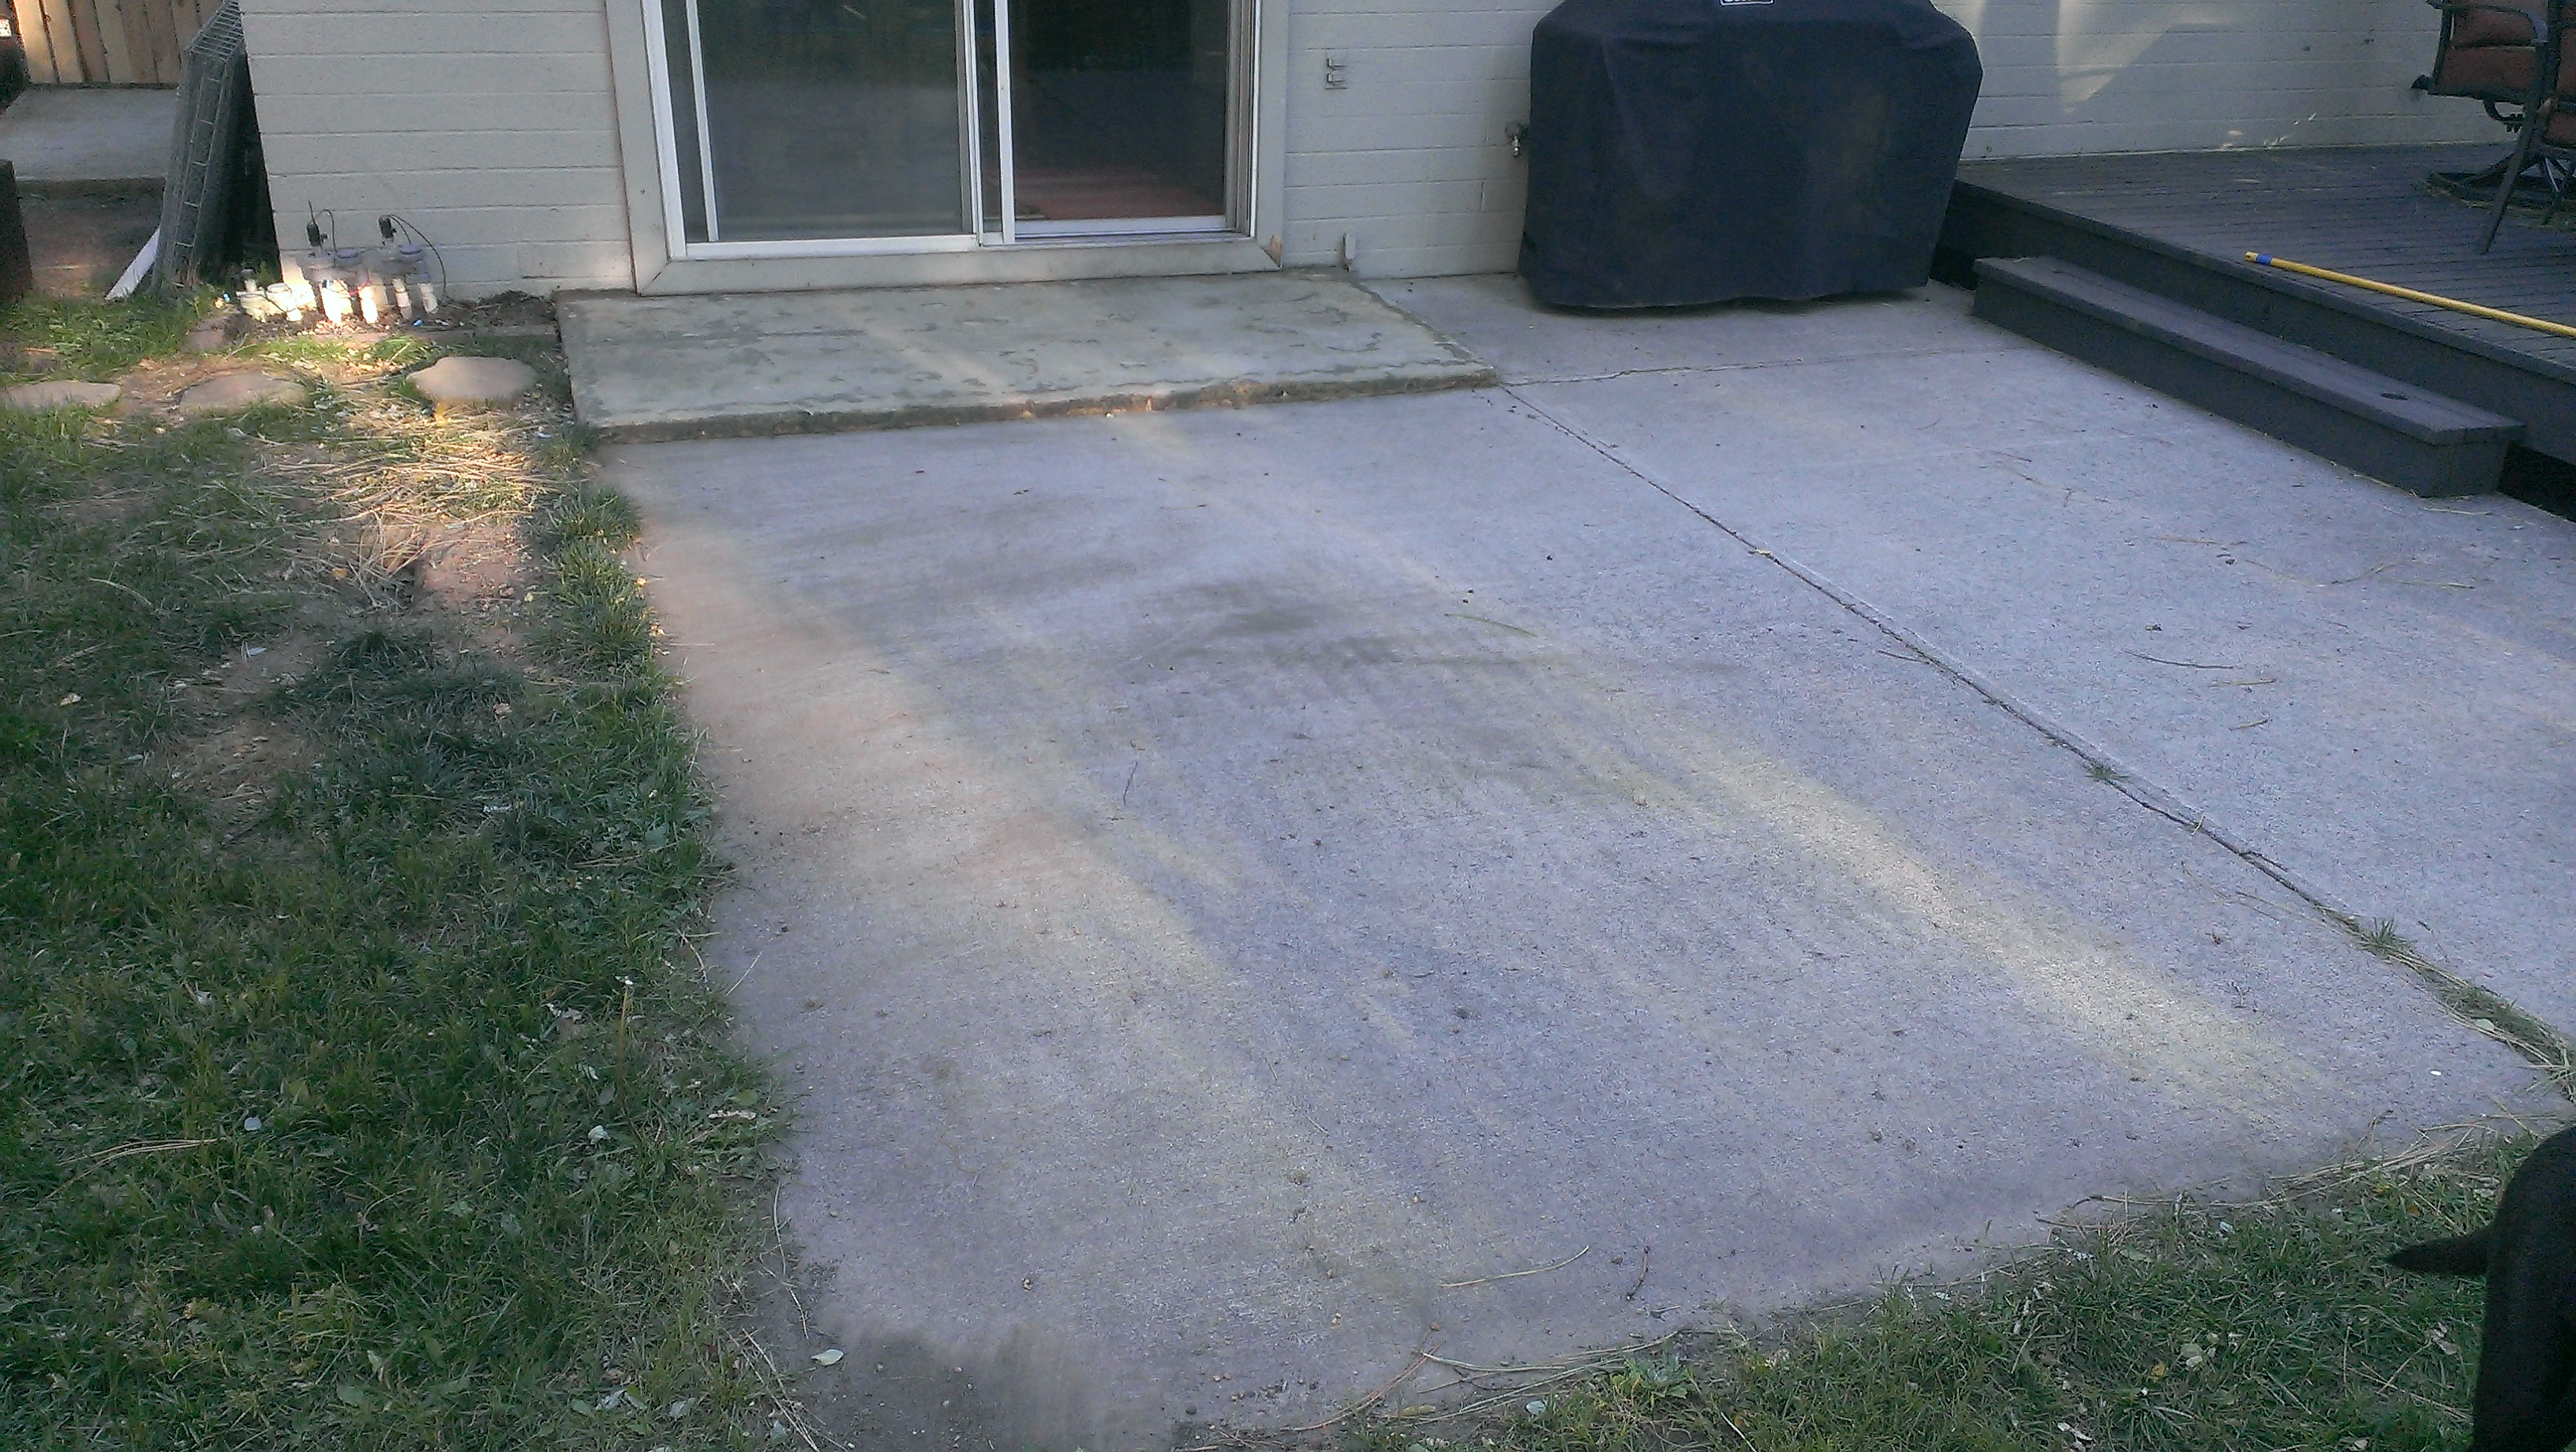
So that’s how I redid our cement slab patio and made it into a nice paver patio instead! There are a few finishing touches left, but it is basically done and it looks great. I wonder what project I’ll tackle next time the government shuts down…


How to Build a Paver Patio on a Cement Slab: Step 2 – Prepare

In my last post on patio building, I destroyed the small concrete step that was interfering with my grand plans. Now it’s time to prepare for the actual construction of the patio. The first thing I had to do was get rid of the concrete rubble where the step was and fill it in with something to make a surface level with the concrete slab.

The typical way to build a paver patio is to put down a thick gravel layer with packed sand on top of it, so I figured that’s what I should do for my busted-up step area. I used as much of my crushed concrete as possible: it seemed silly to remove all the concrete gravel that I had just made so that I could fill it back in with… more gravel. On top of the gravel base, I dumped several bags of “Paver base sand” from Home Depot. This is just sand with some gravel mixed in.

For a full-sized patio with this gravel+sand base, you rent a plate compactor to make the base as firm as possible, but it seemed a bit impractical to rent a massive machine that I would need multiple people to help with, just to compact a 4 foot by 8 foot area. So Instead I opted to get a hand tamper and just go to town. The hand tamper is just a square metal plate on a wooden handle, and you use it to pound the sand flat. It works, but it is surprisingly tiring. Here’s what my mostly-compacted area looked like:IMG_9950

You might notice the stylish plastic edging material in the foreground of this photo. This is what is used to keep the bricks in place on a normal patio, and I thought I would need it too. But as you’ll see it turns out this just got in the way of my edge blocks.

With the step area filled in, it was time to do some planning. For a cement slab base, the consensus on the internet seemed to be that you glue down the border with thick pavers and then choose a thinner type of paver for the middle area. The difference in height is to allow for a layer of sand on top of the slab: this is there to help seat the pavers firmly and to squeeze up between them, locking them into place. We decided to use Rumblestone pavers for the border and Domino pavers for the main area of the patio.

I spent a really long time playing around in GIMP (a free photoshop-like tool) to figure out exactly how many bricks of each type I would need. The goal was to (a) not buy too much, and (b) minimize the amount of brick-cutting. I ended up cheating a bit by allowing the edge bricks to hang over the edge of the slab slightly. This made it so that the only cutting I had to do was one row of the domino pavers along the wall of the house. There is also a light pole in one corner of the patio that required a simple cut.

Patio_Layout


With my plan in place, I calculated how much additional sand I would need, and then took yet another trip to Home Depot, where I ordered a whole lot of bricks and sand. When buying supplies for such a big project, you get to saunter up to the “contractors checkout” area as if you know what you’re doing. The guys there helped place the order but it turned out that they didn’t have all the bricks I needed in stock so it was going to be a few days before I could make much more progress.

Finally, the bricks and sand came in! The truck arrives with a forklift, so they can maneuver the pallets of supplies as close to the area you’re working as possible. Unfortunately tree branches prevented the forklift from getting much beyond the sidewalk…

1378510_10103130515044573_953095800_n

To secure the border bricks, I had originally been planning to use normal construction adhesive that you apply with a caulk gun, but I found this weird stuff that comes in a can that claims to be equivalent to eight tubes of the normal stuff. It worked out to be cheaper so I figured I would give it a try.

IMG_9984


I used a stiff-bristled brush to scrub the cement slab clean before applying the adhesive and sticking the border bricks down. It takes a while for the adhesive to set, and the edge of our concrete slab was slightly sloped to help with runoff, so I had to use other bricks to keep the edge bricks level while the adhesive hardened. Small pebbles placed between the edge bricks and the slab were also useful as shims to make the edge bricks sit level.

IMG_9987

As you can see in the above picture, I used a variety of levels to make sure the edge bricks were level and in a nice straight line. You may also notice that I removed the wooden step from the deck. It was not in great shape anyway, and this again made the patio layout much simpler than it would be working around it.

it ended up being extremely difficult to make the border bricks for a perfect rectangle with straight sides at right angles to each other, even though I was working on an existing slab. I also found that the domino pavers seemed to be a tiny bit shorter than advertised, so when I laid them out there was a little bit of extra room. In the end this turned out not to be a problem (the sand between the pavers helps take up this extra space) but I agonized over it for a while. Finally, I just decided to glue down the edges as well as possible and deal with the consequences. I had to cut the very final brick of the edge to make it all fit, but in the end it looks fine.

The other cut i had to make for the edge was to deal with a small pipe that sticks out from the wall of the house. I was worried this would make things complicated but it was surprisingly easy to deal with. I just used a masonry blade on my circular saw to cut notches in the brick whose corner I had to remove, and then tapped it with a chisel to finish the job.

IMG_9989

IMG_9991


That’s all for this episode of patio-building. Stay tuned for the thrilling conclusion!


How to Carve a Mars Rover Pumpkin

Over the weekend we had some friends over to carve pumpkins. While others went a more traditional route, I decided I wanted to do a Mars rover-themed pumpkin. The trick was, making it recognizable and not too complicated. I ended up finding a nice silhouette of Curiosity that worked well as a template for a pumpkin, so I thought I would share it here:

rover_silhouette_pumpkin

It’s not super high-res, but then, pumpkin templates really shouldn’t be. I just printed this out in landscape mode, stretched to fill a full sheet of paper, and then attached the paper to my pumpkin with a few toothpicks. Our friends bought one of those cheap pumpkin carving kits, which included a little tool that looks like a cowboy’s spur. The idea is that the little spiked wheel punches through the paper and transfers the design to the pumpkin’s skin. You could also just use a needle or pin. (I tried a toothpick, but the point bent after the first few holes so it didn’t work very well). I left out some of the more intricate details of the silhouette to make carving easier.

Once I had the design transferred, it was pretty simple to just carve along the outline (though a skinny knife is helpful for some of the details. Here’s the finished product:

MSL_curiosity_pumpkin


How to Build a Paver Patio on a Cement Slab: Step 1 – Destroy the Step

As you may have heard, the government was recently shut down for 16 days. I’m a government employee so that meant I suddenly had a lot of unexpected free time. My first instinct was to fill the time with video games and catching up on TV shows, but after a few days of being a lazy bum, I decided that I should take on a project. A big, time-consuming one. Looking out the sliding glass door to our patio, I decided it was time for it to get a face lift.

Here’s why:

IMAG0358


Our patio was a boring cement slab. Functional, but not particularly nice. I decided that it was time to make this into an attractive feature of our back yard rather than just a tolerable place to keep the grill.

Before doing anything, I read a lot about the options on the internet. I had tons of free time, remember? My first instinct was to do a paver patio, but I quickly ran into a problem: there was a 2″ tall step outside our door before the full patio began. Our best theory is that the step was poured when the house was built and then the rest of the patio was poured later as an add-on. Unfortunately, the step gave us very little room to work with before hitting the frame of the sliding glass door:

IMAG0361


So for a while, I was considering doing tiles instead of pavers. Tiles would be nice and thin, so they could just be applied to the existing step and still leave room for the door frame. Unfortunately, we live in Flagstaff, where it get very cold and the temperature swings pretty drastically from day to night, meaning lots of freeze-thaw action. I was very paranoid about laying tiles only to have them pop up after going through a winter. The same concern applied for the option of just mortaring a layer of bricks down.

With tiles I would also have to worry about the control joints in the concrete slab. These are notches that are made in the slab when it is poured in an attempt to guide the inevitable cracking that occurs as a slab cures and settles. When laying tile on a slab, you pretty much have to line up a seam in the tile with the control joint or risk damage down the road when the slab shifts and cracks any tiles that span the joint.

Tiles are also expensive! And if you mess them up, well, they are stuck to the concrete slab surface so you pretty much have to tear the whole thing out and start over from bare dirt.

After reading as much as I could stand on the internet and consulting with my dad, who has a lot of experience with home improvement projects, I decided that pavers were the way to go. There are still plenty of mistakes possible with pavers, but they tend not to be as irreversible as with tiles.

But what about that step? There are thin pavers on the market, but not many. Most pavers are 2.5″ or 3.5″ thick: too thick to go on top of our little step and leave room for the door. So, the step had to go. My first idea was to rent a concrete saw, cut notches into the step, and then break off the chunks until the step surface was roughly the same height as the main patio surface. I asked the guys at home depot what they thought of this plan, and they recommended just destroying the step entirely. My dad concurred, suggesting that it might even be possible to pry the step up and bust it with a sledgehammer.

It turned out Home Depot’s rental masonry saw was missing a part, so I decided to try just getting masonry blades for my circular saw and cutting it myself. The blades are cheap (~$3) and they are designed to gradually grind away as you cut, so I bought three of them. I also purchased an 8 pound long-handled sledgehammer and a “San Angelo Bar“, which is basically a 17 pound, 6-foot steel bar with a pencil point on one end and a chisel tip on the other. I also purchased some decent safety equipment to protect my eyes, ears, and lungs from the concrete dust and shrapnel I was about to produce. I already had some sturdy leather gloves.

Fully encased in protective equipment and ready to demolish a concrete step!

Fully encased in protective equipment and ready to demolish a concrete step!

So, armed with my new tools and protective gear, I set to demolishing the step. I quickly discovered that, while masonry blades on a circular saw will cut concrete, it is an incredibly slow, loud, dusty process. It was going to take hours to destroy my little 4 foot by 8 foot by 5 inch thick step. I also tried just using the sledge hammer to start cracks and then a combination of the San Angelo bar, a masonry chisel, and my rock hammer to break it up. Here’s what I managed to do in an hour:

An hour's worth of work with circular saw, sledge, and chisel.

An exhausting hour’s worth of work with circular saw, sledge, and chisel.

You’ll notice the cardboard in the above picture. That was there to prevent fragments of flying concrete from breaking our sliding glass doors. I may have been a bit optimistic about how well it was going to break up. Clearly, I needed a better tool if I was going to finish breaking up that step in less than a week. Enter: the Jackhammer.

I rented the jackhammer for 4 hours from Home Depot. Did you know that jackhammers are really heavy? They basically rely on their own weight to break up the concrete, so the hardest part of using one is not when the thing is turned on. At that point, you just have to keep it from falling over. The hard part is extracting it from the hole in the concrete that it just made and re-positioning it to repeat the process. The one I rented weighted 70 pounds, and it was not long before all the muscles in my body were very upset with me.

There were a few times when I moved the jackhammer a little bit too far into unbroken concrete so instead of breaking off a chunk, it just drilled a hole in the slab and got stuck, looking like a giant had thrown a 70 pound jackhammer-shaped dart at the step. Then I got to smash away at the surrounding concrete with my other tools until the jackhammer came loose again. Moral of the story: slow and steady wins the race. Only move the jackhammer a little bit so that each time you turn it on, it breaks off a chunk instead of getting stuck.

IMG_9943

I ended the day sore all over, bruised, and dusty, but the jackhammer did its job and destroyed that step. Inside the step, there were several meshes of reinforcing steel wire, so it turned out to be a good thing I rented the jackhammer instead of just trying to tough it out with lesser tools.

Chunks of concrete still clinging to the steel reinforcing mesh that I dragged from the rubble of the step.

Chunks of concrete still clinging to the steel reinforcing mesh that I dragged from the rubble of the step.

At this point I was committed. I had made a giant mess, and had to see the project through because a pile of rubble is even worse than a slab patio! I still had to figure out what to replace the step with, what type of pavers to use, whether they should be laid on sand or directly on the concrete, and a million other questions. But those are questions for another post. Stay tuned for the continuing saga of the patio project!

© 2024 Ryan Anderson

Theme by Anders NorenUp ↑